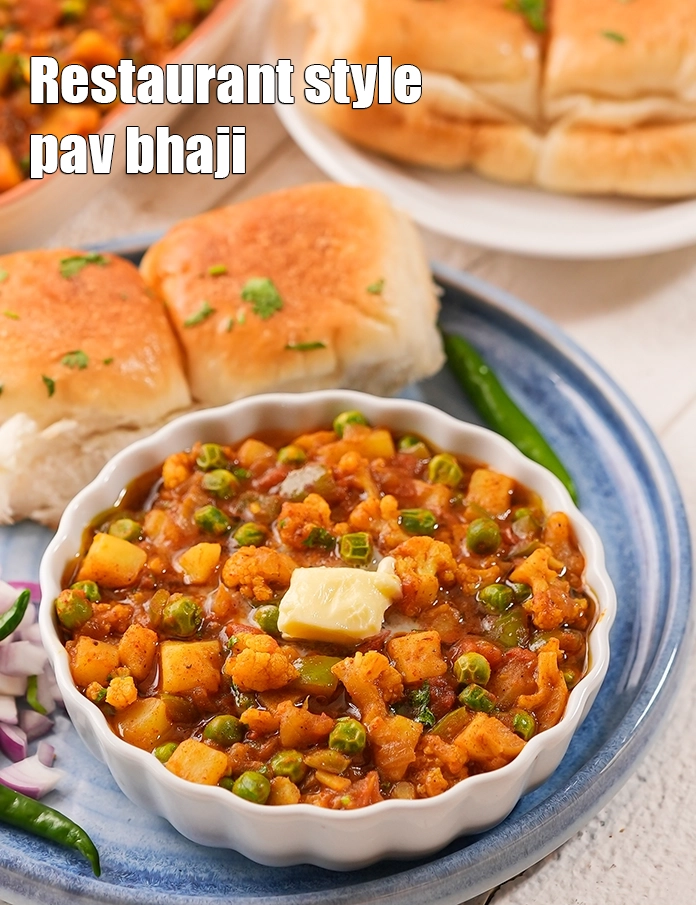
You are here: Home> Course > Dinner Sabzi > Indian Dinner > Khada Pav Bhaji, Restaurant Style Pav Bhaji
Khada Pav Bhaji, Restaurant Style Pav Bhaji

Tarla Dalal
23 February, 2025
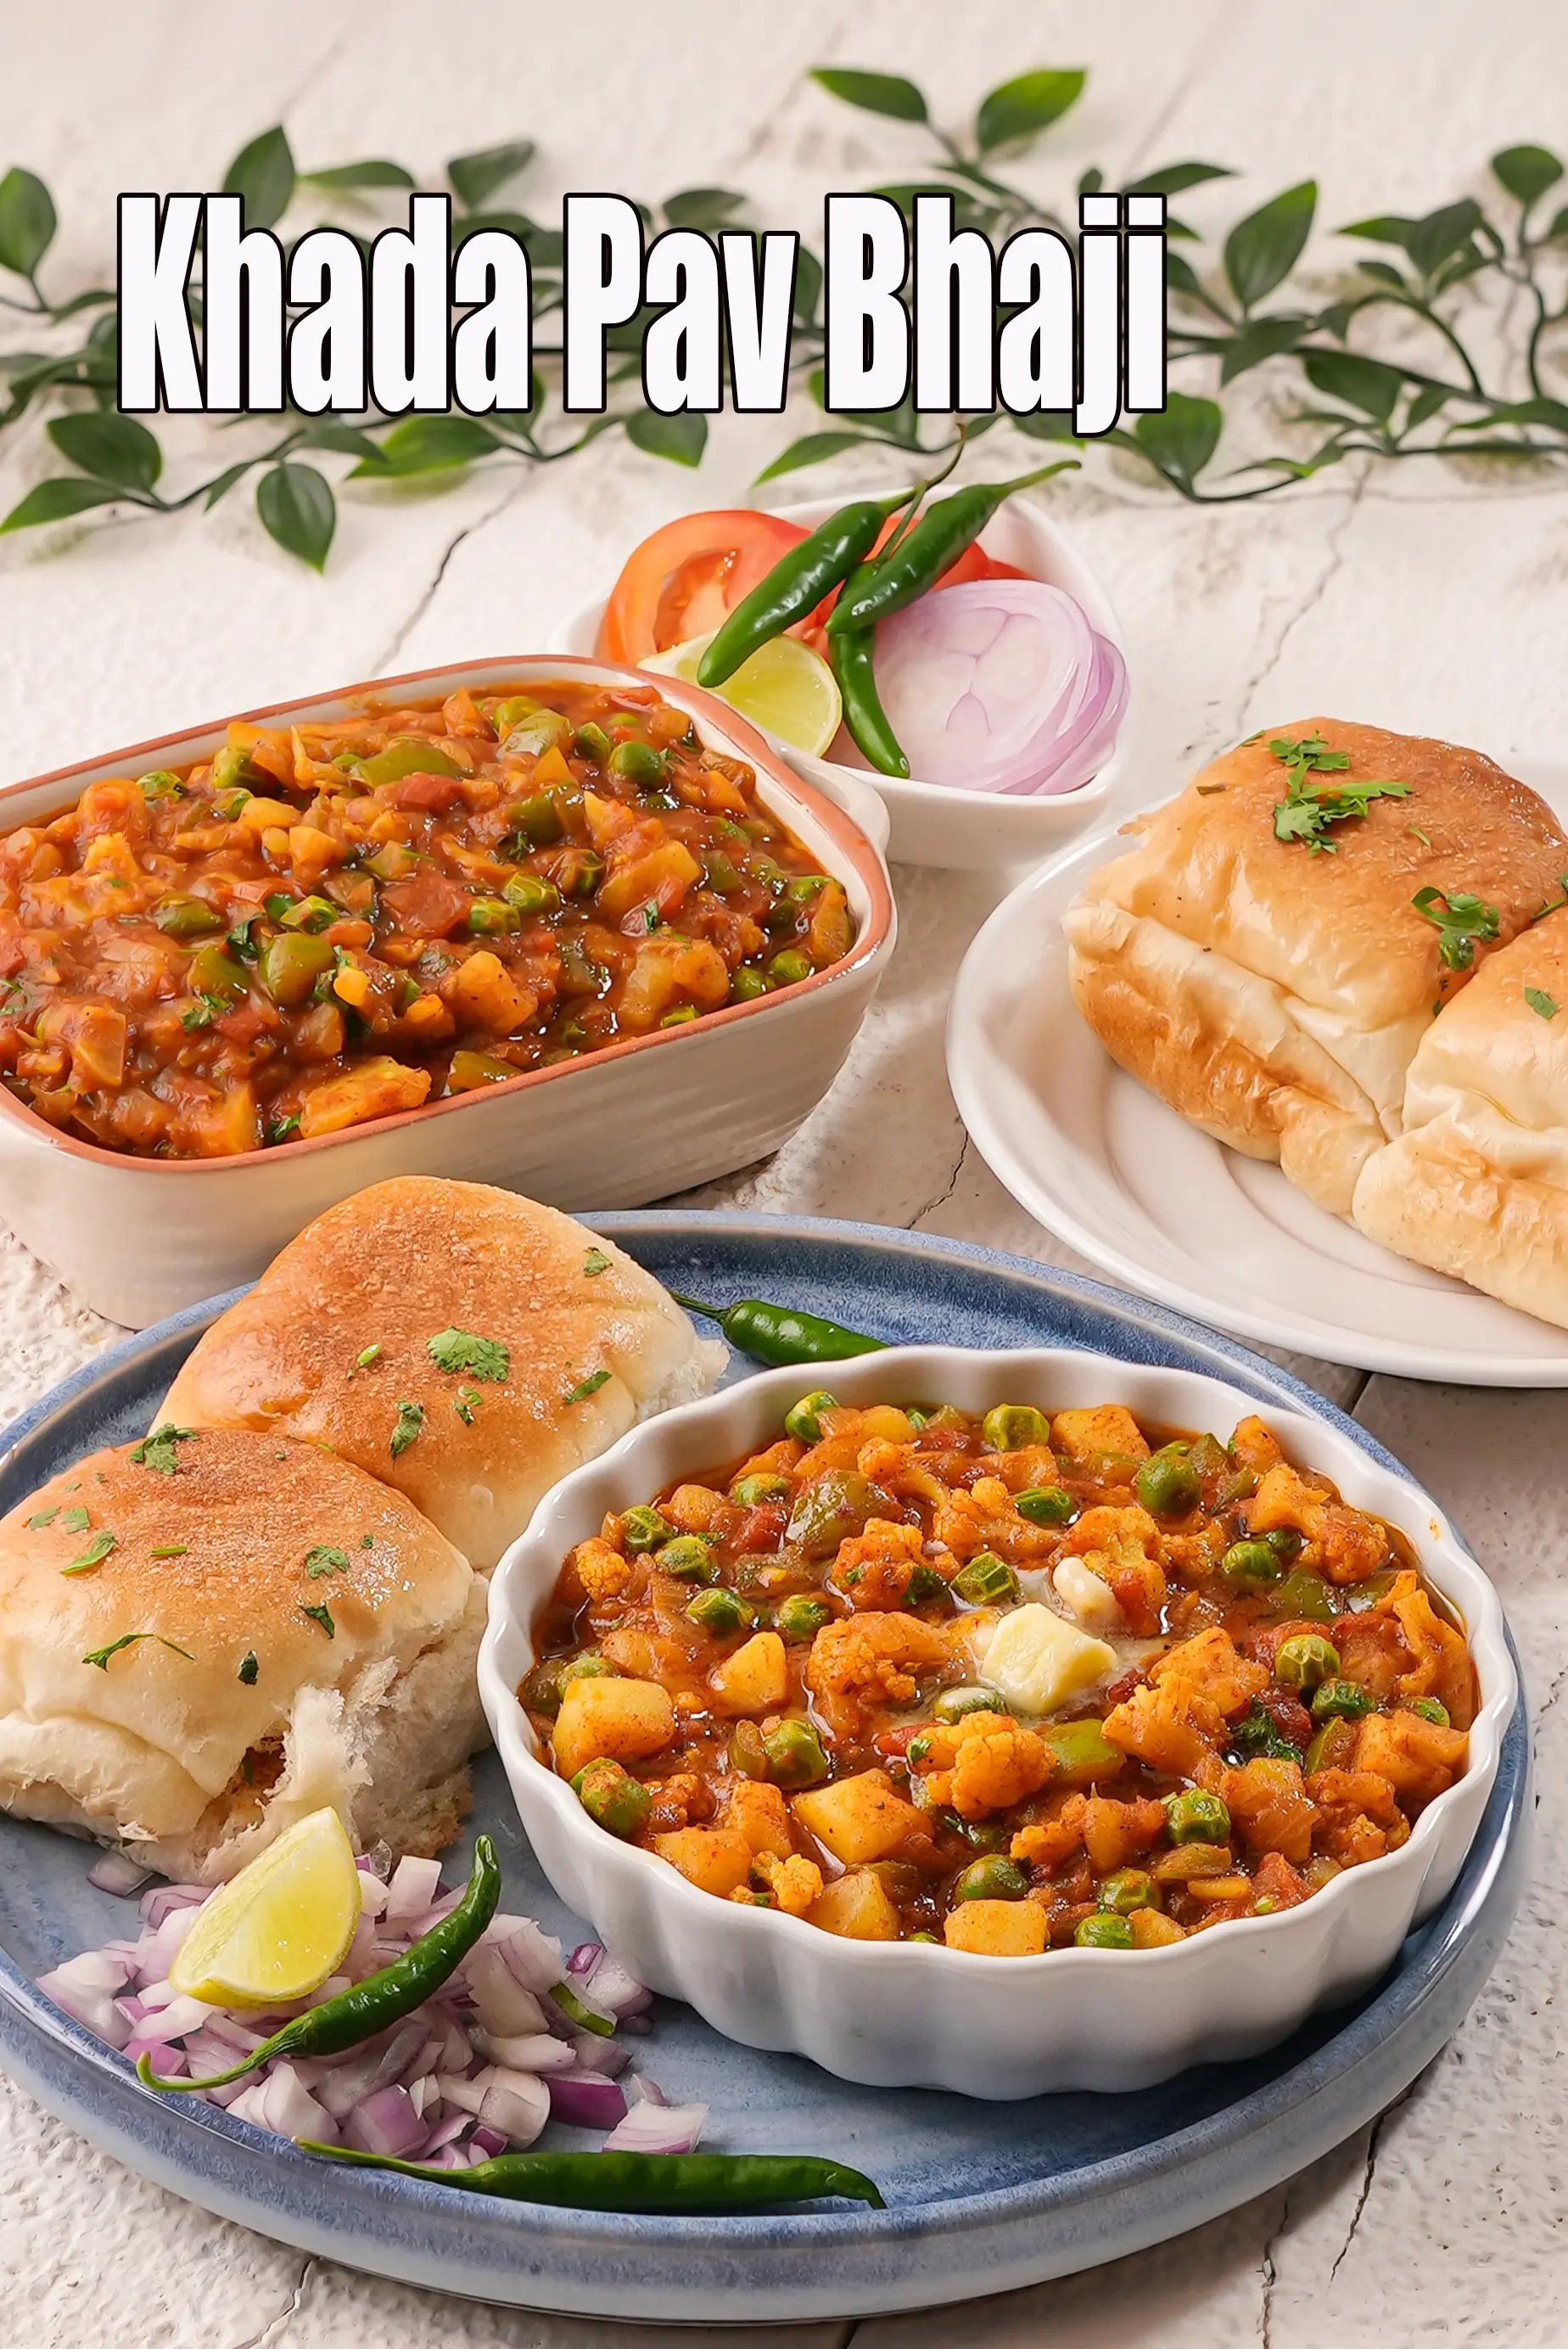
Table of Content
|
About Khada Pav Bhaji, Restaurant Style Pav Bhaji
|
|
Ingredients
|
|
Methods
|
|
How to make roadside famous khada bhaji
|
|
For the buttered pavs
|
|
How to serve Khada pav bhaji
|
|
Nutrient values
|
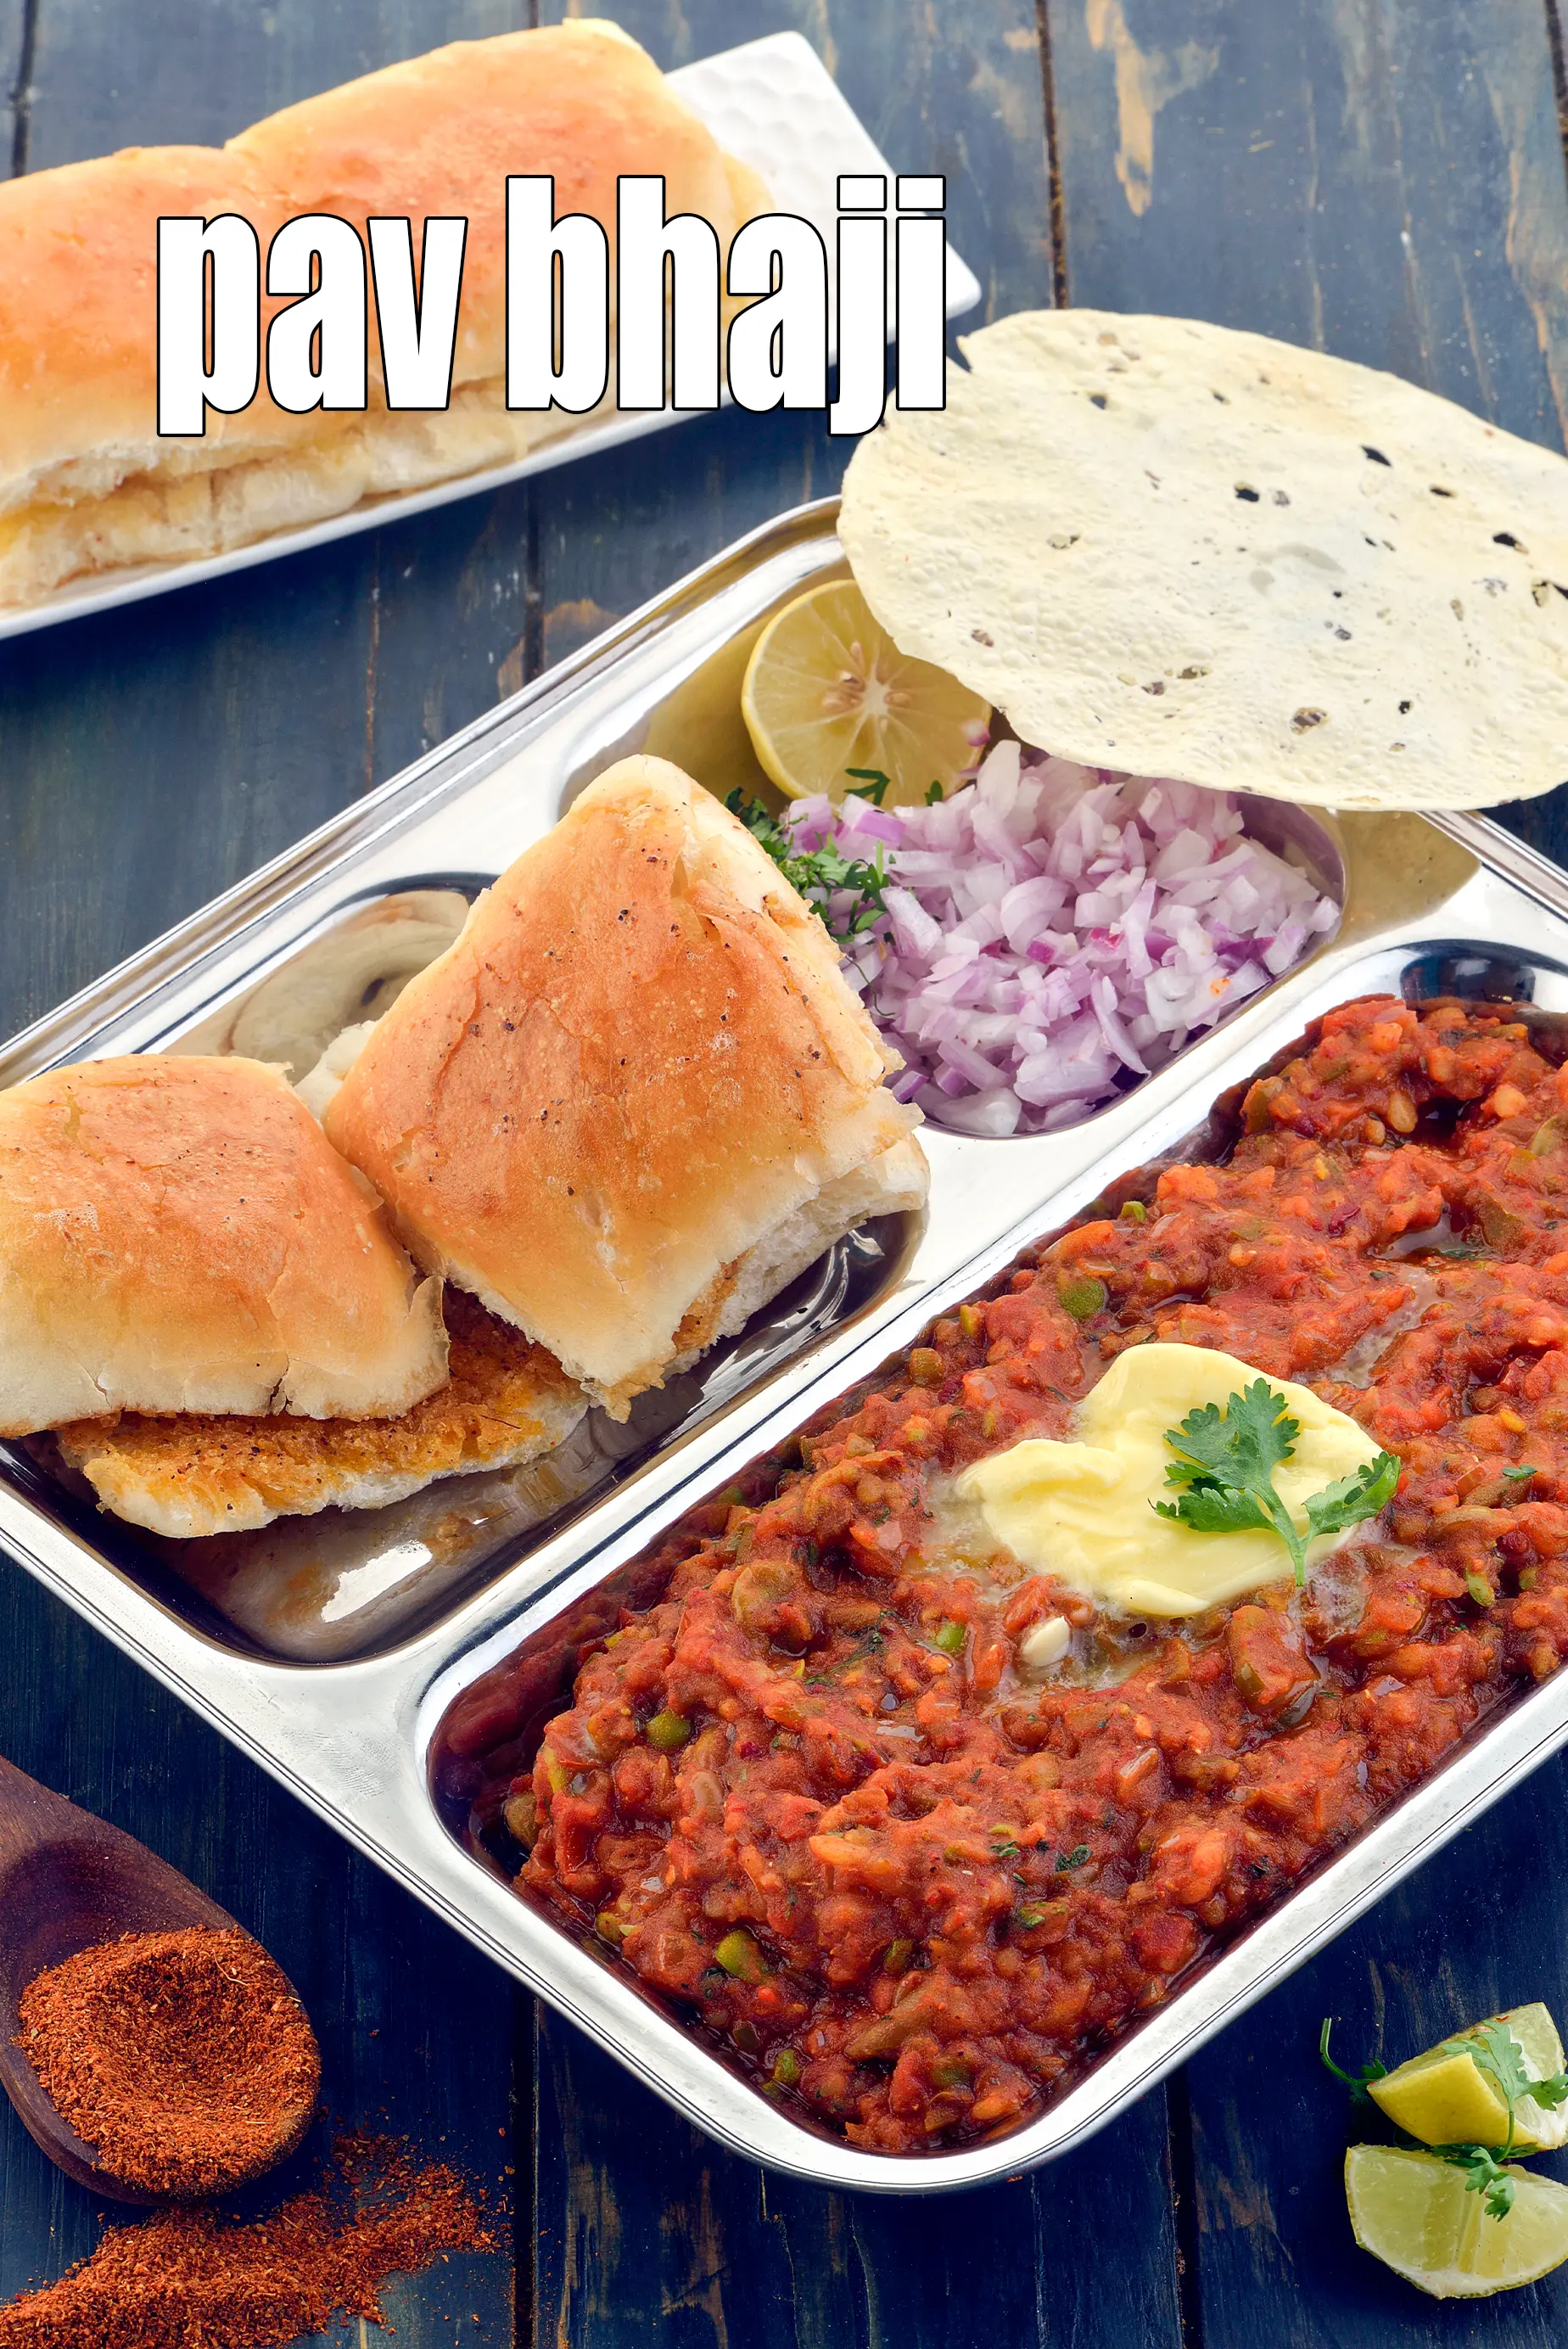
khada pav bhaji recipe | restaurant style khada pav bhaji | akkha pav bhaji | with 27 amazing images.
Khada Pav Bhaji is a variation of the popular Indian street food, Pav Bhaji. "Khada" means "standing" or "whole" in Hindi, and refers to the way the vegetables are coarsely mashed, leaving some chunks intact. This gives the bhaji a rustic texture and heartier feel compared to the smooth, mashed version. Learn how to make khada pav bhaji recipe | restaurant style khada pav bhaji | akkha pav bhaji |
Khada Pav Bhaji is a delightful variation of the popular Indian street food, Pav Bhaji. What sets it apart is that the vegetables are not mashed into a smooth paste but are instead kept in small, chunky pieces. This gives the dish a unique texture and allows you to savor the individual flavors of each vegetable.
The preparation involves cooking a medley of vegetables like potatoes, cauliflower, carrots, peas, and bell peppers in a rich tomato-based gravy. The restaurant style khada pav bhaji is then generously spiced with a blend of aromatic spices, including pav bhaji masala, which gives it its signature flavor. Khada Pav Bhaji is typically served with buttered pav (bread rolls) and garnished with chopped onions, cilantro, and a squeeze of lime juice.
pro tips to make khada pav bhaji: 1. Don't mince your vegetables! Aim for roughly chopped pieces. This is crucial for the "khada" (standing) texture. 2. Don't skimp on the butter! It adds richness and depth to the dish. Use both regular butter and white butter if available for that authentic street style flavor. 3. A generous squeeze of fresh lemon juice at the end adds a tangy kick that balances the richness of the butter and spices.
Enjoy khada pav bhaji recipe | restaurant style khada pav bhaji | akkha pav bhaji | with detailed step by step photos.
Tags
Preparation Time
20 Mins
Cooking Time
15 Mins
Total Time
35 Mins
Makes
4 servings
Ingredients
For The Khada Bhaji
2 tbsp butter
2 tsp garlic (lehsun) paste
1 cup chopped onion
1 cup chopped tomato
1/2 cup chopped capsicum
1/2 cup boiled cauliflower florets
1/2 cup boiled green peas
1 1/2 cups boiled potato cubes
2 1/2 tsp chilli powder
1 1/2 tbsp pav bhaji masala
1/2 tsp turmeric powder (haldi)
salt to taste
1/4 cup chopped coriander (dhania)
2 tsp lemon juice
For The Buttered Pavs
4 tbsp butter
2 tsp pav bhaji masala
8 ladi pav
For Serving
1/2 cup chopped onion
Method
For the khada bhaji
- Heat the butter in a deep non-stick pan, add the garlic paste and onions and sauté on a medium flame for 2 minutes.
- Add the capsicum and tomatoes, mix well and cook on a medium flame for 2 to 3 minutes, while stirring occasionally.
- Add the cauliflower, green peas, potatoes, chilli powder, pav bhaji masala, turmeric powder, salt and 1 cup of water, mix well and cook on a medium flame for 4 to 5 minutes, while mashing it lightly with a masher. Do not mash it too much as we need whole vegetables.
- Switch off the flame, add the coriander and lemon juice and mix well. Keep aside.
For the buttered pavs
- Slit all the ladi pavs.
- Heat 1 tbsp of butter in a non-stick tava (griddle) , put ½ tsp pav bhaji masala, place 2 slit ladi pavs on it and cook on a medium flame till it turns golden brown in colour from both the sides.
- Repeat step 2 to cook 6 more ladi pavs in 3 more batches.
How to serve
- Just before serving, re-heat the khada bhaji and serve with pavs, onions and lemon wedges.
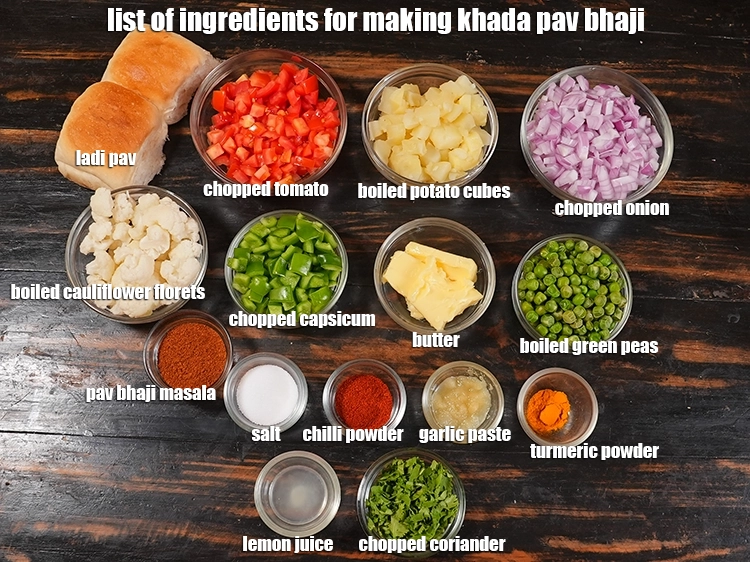
what is Khada Pav Bhaji made of?
See the below image of list of ingredients for making Khada Pav Bhaji.
Khada Pav Bhaji Recipe, How to make Mumbai Khada Pav Bhaji Video by Tarla Dalal
Khada Pav Bhaji, Restaurant Style Pav Bhaji recipe with step by step photos
-
-
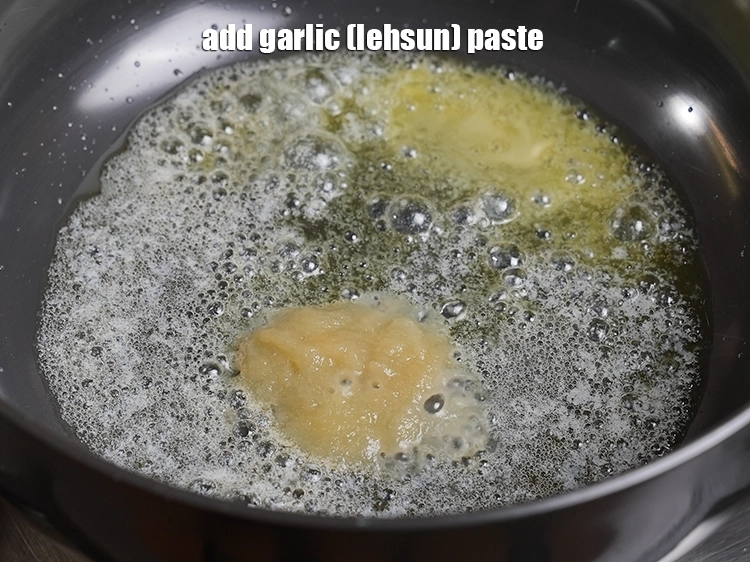
Heat the butter in a deep non-stick pan.

![]()
-
Add the 2 tsp garlic (lehsun) paste. Many people even prefer adding Chilli Garlic Chutney.
![]()
-
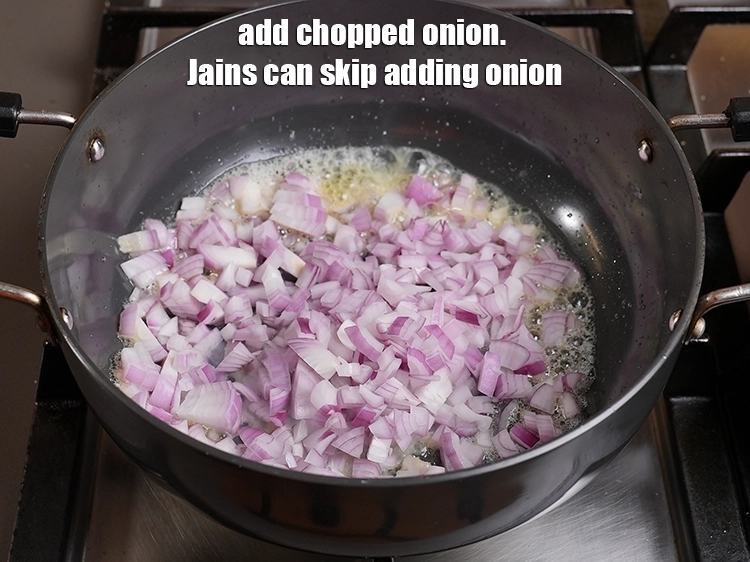
Also, add the 1 cup chopped onion. Jains can skip adding onion.
![]()
-
Sauté on a medium flame for 2 minutes.

![]()
-
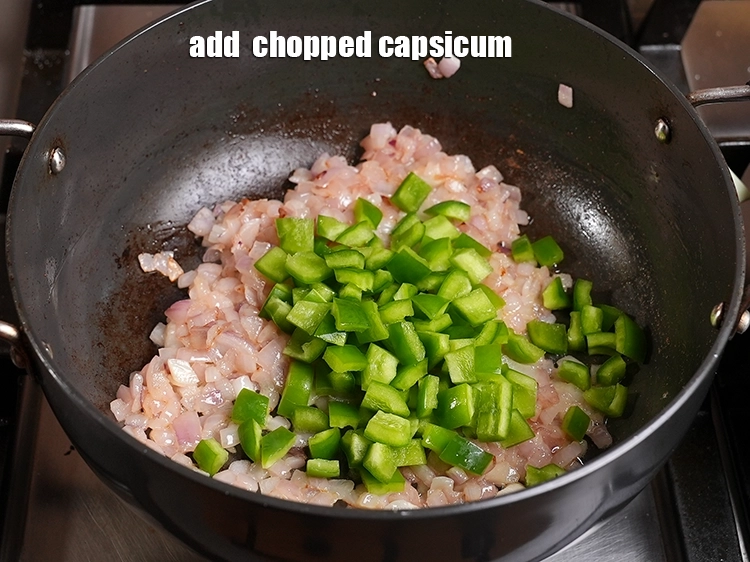
Add the 1/2 cup chopped capsicum.
![]()
-
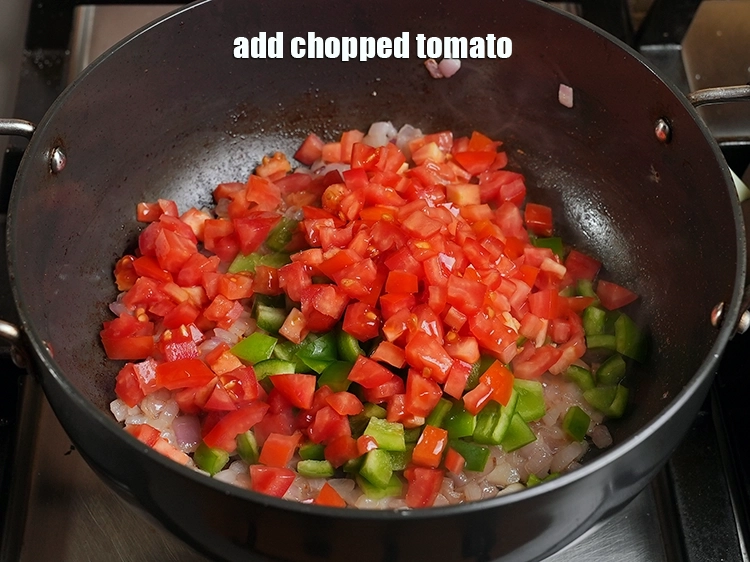
Add the 1 cup chopped tomato.
![]()
-
Mix well and cook on a medium flame for 2 to 3 minutes, while stirring occasionally.

![]()
-
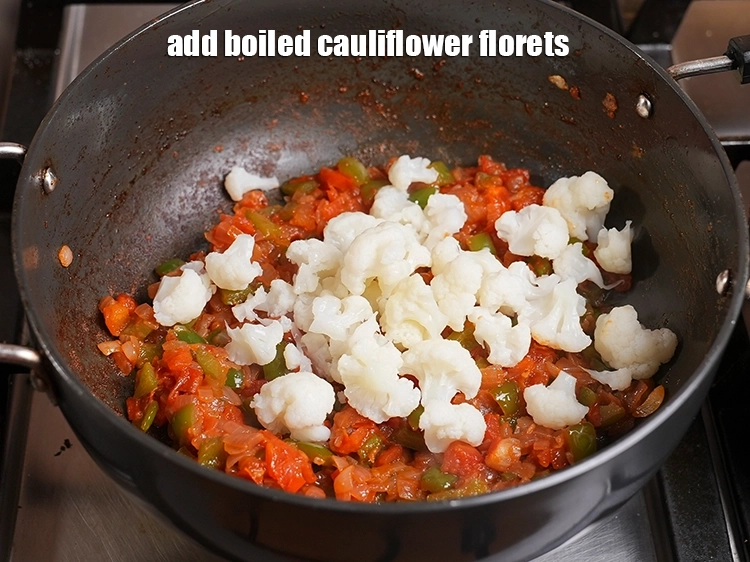
Add the 1/2 cup boiled cauliflower florets.
![]()
-
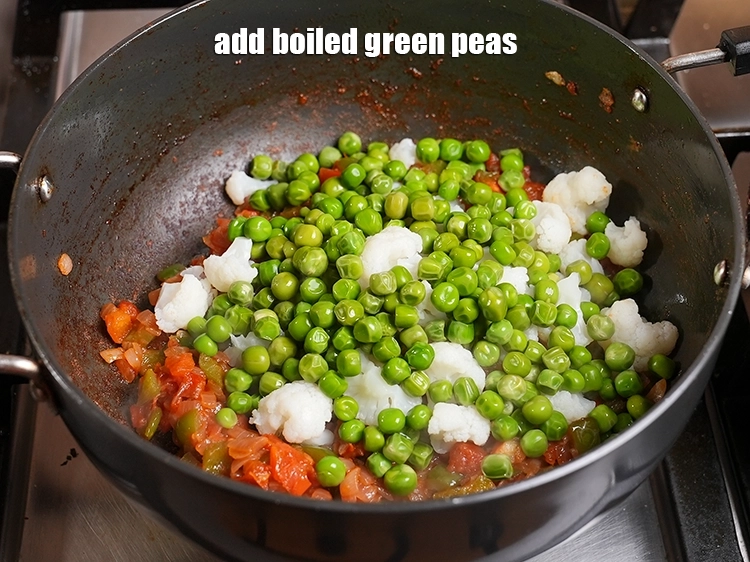
Add the 1/2 cup boiled green peas.
![]()
-
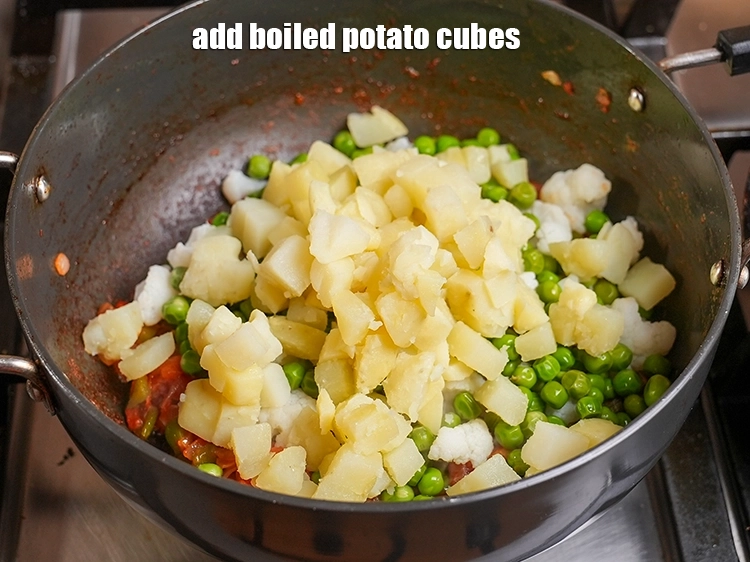
Add the1 1/2 cups boiled potato cubes.
![]()
-
Add the 2 1/2 tsp chilli powder.
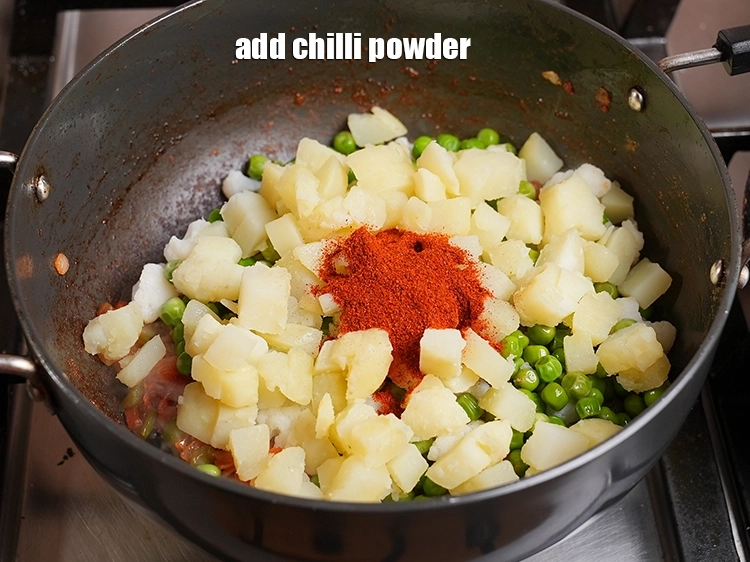
![]()
-
Add the 1 1/2 tbsp pav bhaji masala.
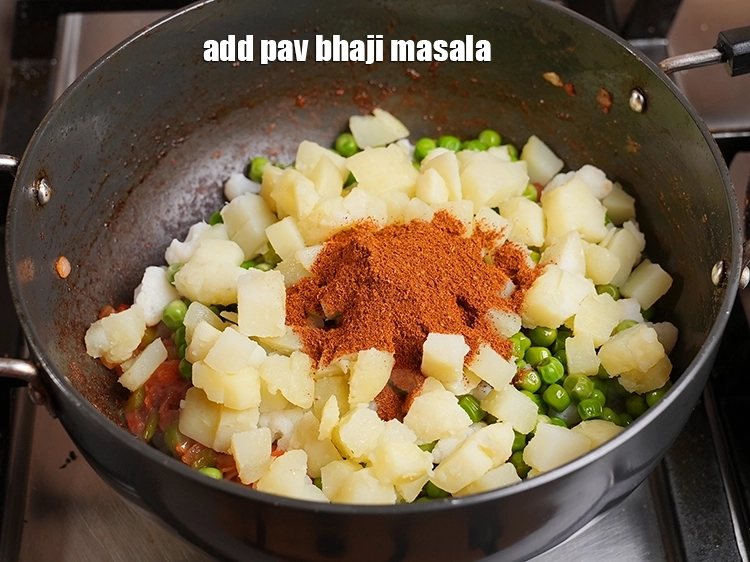
![]()
-
Add the 1/2 tsp turmeric powder (haldi).
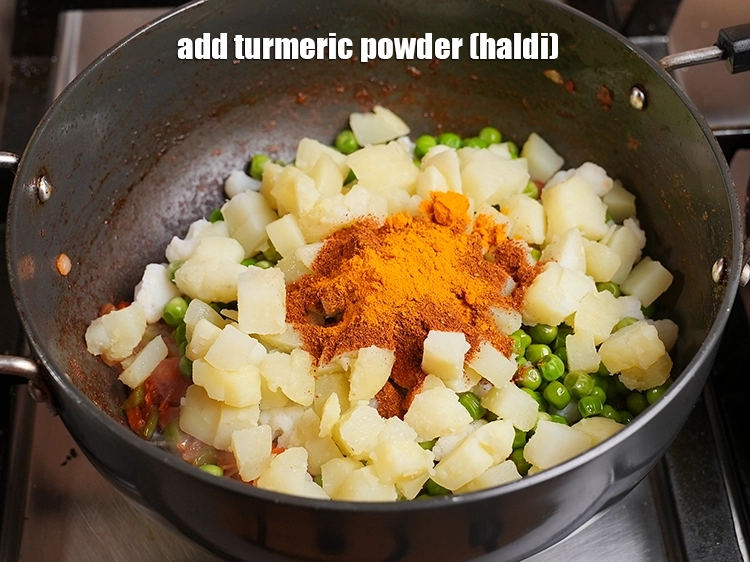
![]()
-
Add the salt to taste.
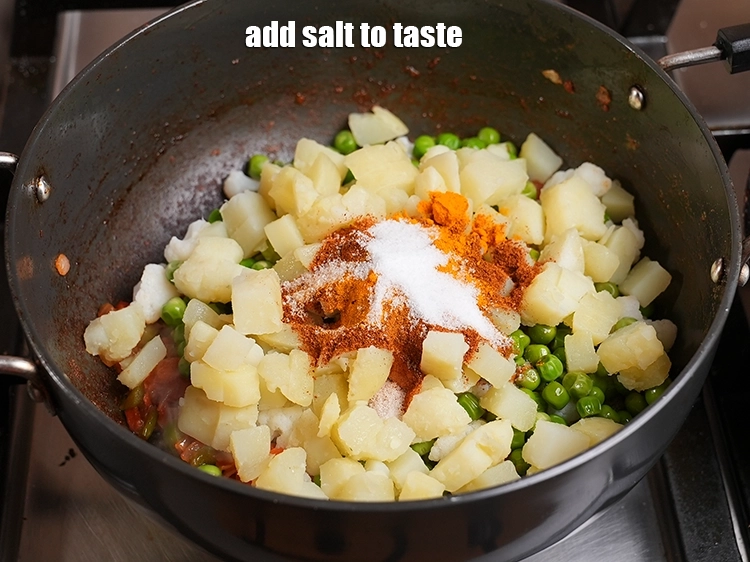
![]()
-
Add the 1 cup of water.
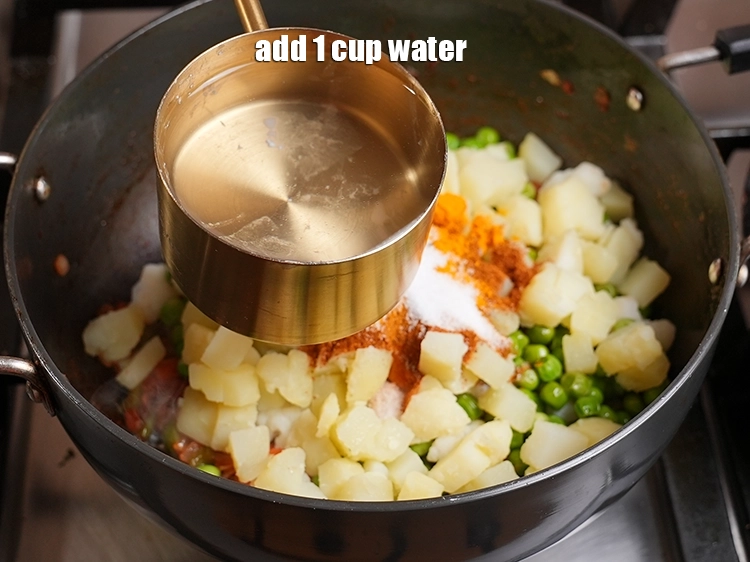
![]()
-
Mix well and cook on a medium flame for 4 to 5 minutes.

![]()
-
While mashing it lightly with a masher. Do not mash it too much as we need whole vegetables.

![]()
-
Add the 2 tsp lemon juice.
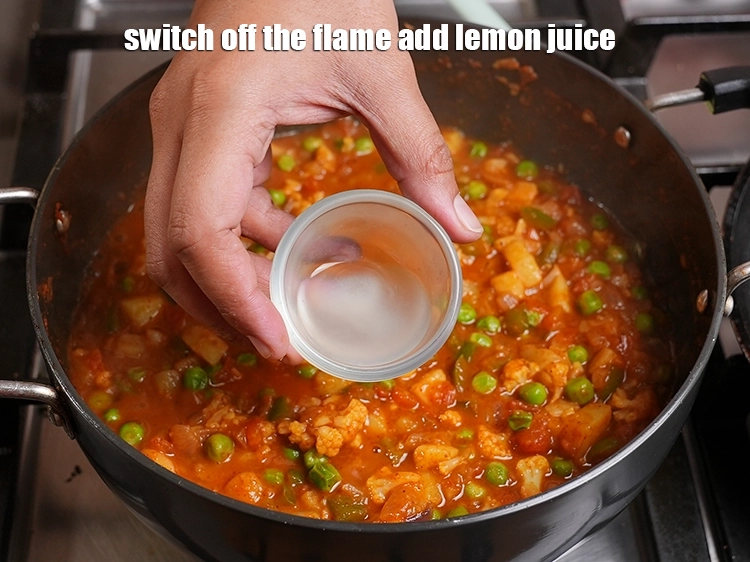
![]()
-
Add the 1/4 cup chopped coriander (dhania).
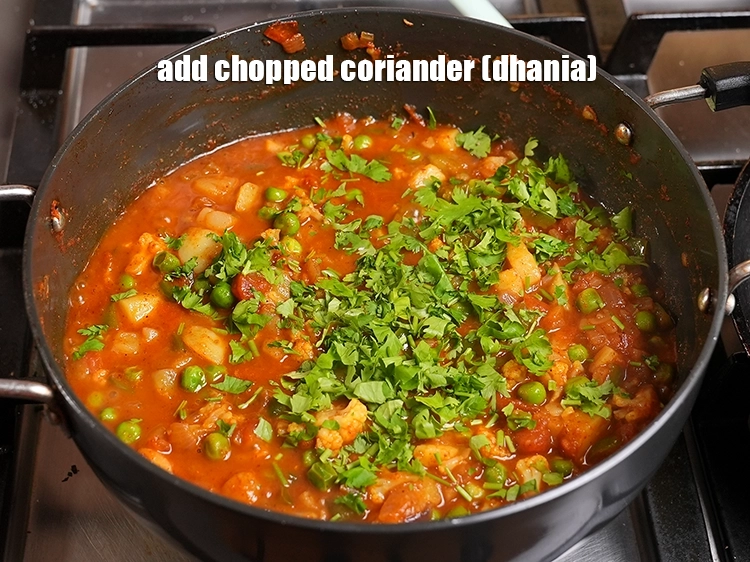
![]()
-
-
-
Slit all the ladi pavs. To make pav at home you can check our recipe for Eggless Homemade Laadi Pav Buns.
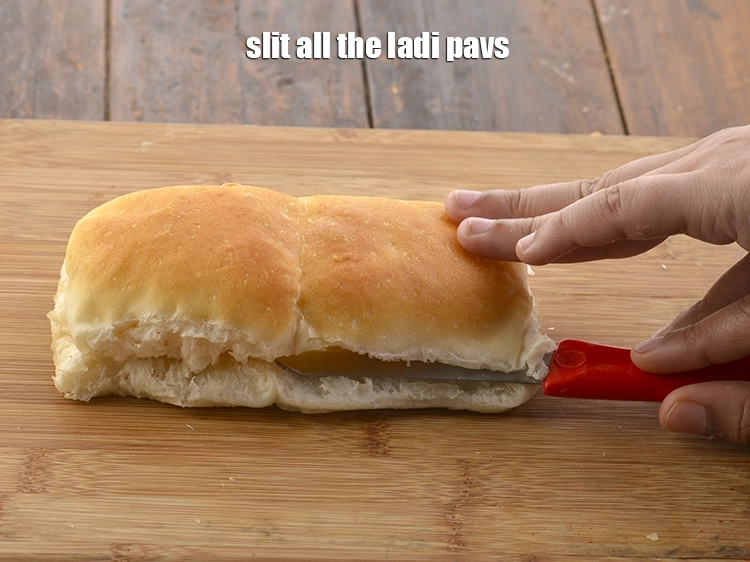
![]()
-
Heat 4 tbsp butter in a non-stick tava (griddle).

![]()
-
Put ½ tsp pav bhaji masala. This being a popular street food of Mumbai, it is loaded with butter but, you can always adjust the amount used.
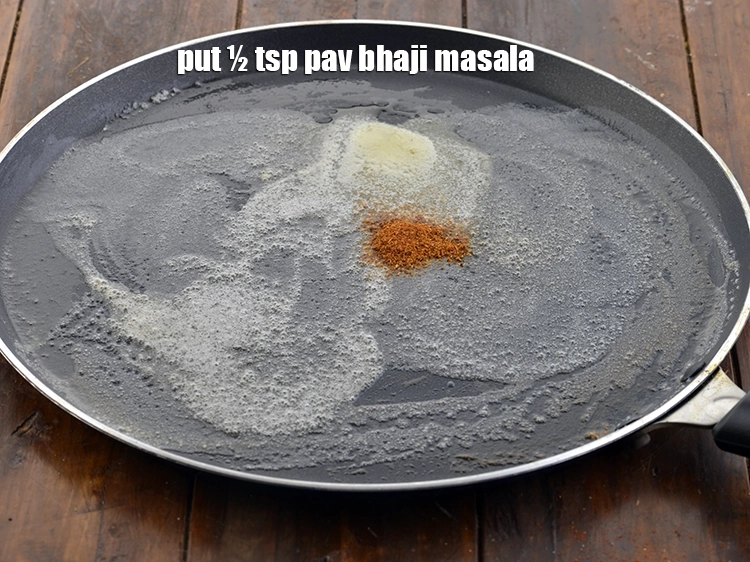
![]()
-
Mix well with the help of a flat spoon.

![]()
-
Place 2 slit ladi pavs on it.
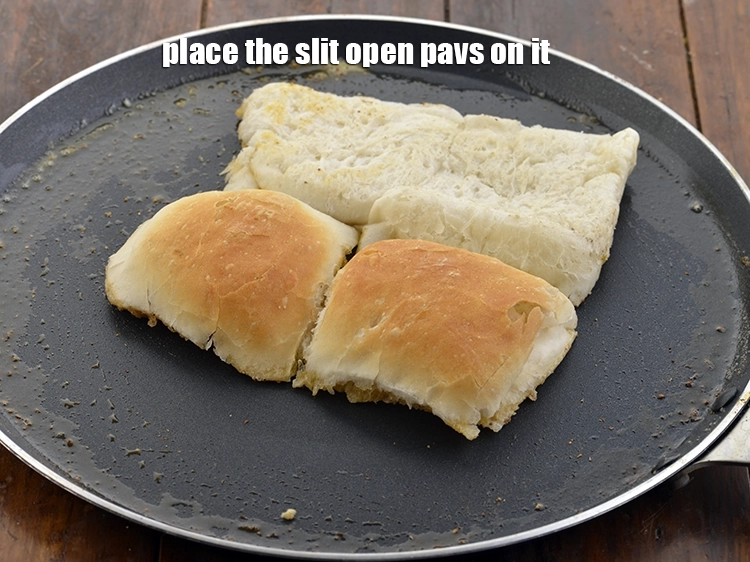
![]()
-
Cook on a medium flame till it turns golden brown in colour from both the sides. Health conscious people can bake Whole Wheat Ladi Pav.

![]()
-
Repeat step 2 to cook 6 more ladi pavs in 3 more batches.
-
-
-
Just before serving, re-heat the khada bhaji and serve with pavs, onions and lemon wedges.
![]()
-
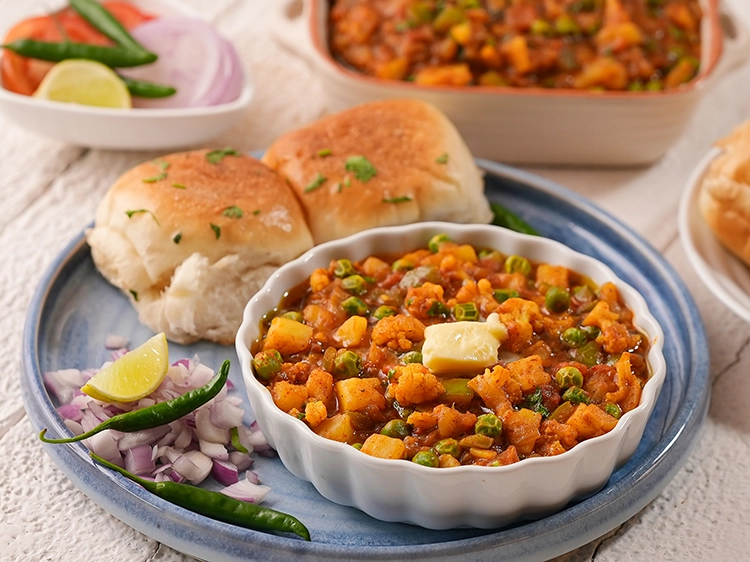
Serve with tongue-tickling tawa pulao to make it a full meal.
![]()
-
If you are looking for more Mumbai roadside recipes then check out Vegetable Grill Sandwich , Schezuan Chopsuey Dosa , Ragda Pattice and Veg Frankie.
-
Nutrient values (Abbrv)per plate
| Energy | 411 cal |
| Protein | 9.3 g |
| Carbohydrates | 58.8 g |
| Fiber | 3.8 g |
| Fat | 15.4 g |
| Cholesterol | 45 mg |
| Sodium | 166.5 mg |
Click here to view Calories for Khada Pav Bhaji, Restaurant Style Pav Bhaji
The Nutrient info is complete

smriti
March 13, 2025, midnight
My dad really likes khada bhaji so I always wanted to learn and make it for him when I came across this recipe i was very very happy and made it for him...He loved every bite of it and told me to make it often...

-2024.webp)