You are here: Home> Cuisine > Indian Veg Recipes > South Indian > Andhra Vegetarian recipes, food > Idli
idli recipe | idli batter recipe | South Indian style idli | soft idli |

Tarla Dalal
15 November, 2019

Table of Content
|
About Idli
|
|
Ingredients
|
|
Methods
|
|
What are Idlis?
|
|
How to make perfect Idli
|
|
Preparation for idli batter
|
|
Batter for idli
|
|
How to make idlis at home
|
|
Frequently Asked Questions
|
|
Nutrient values
|
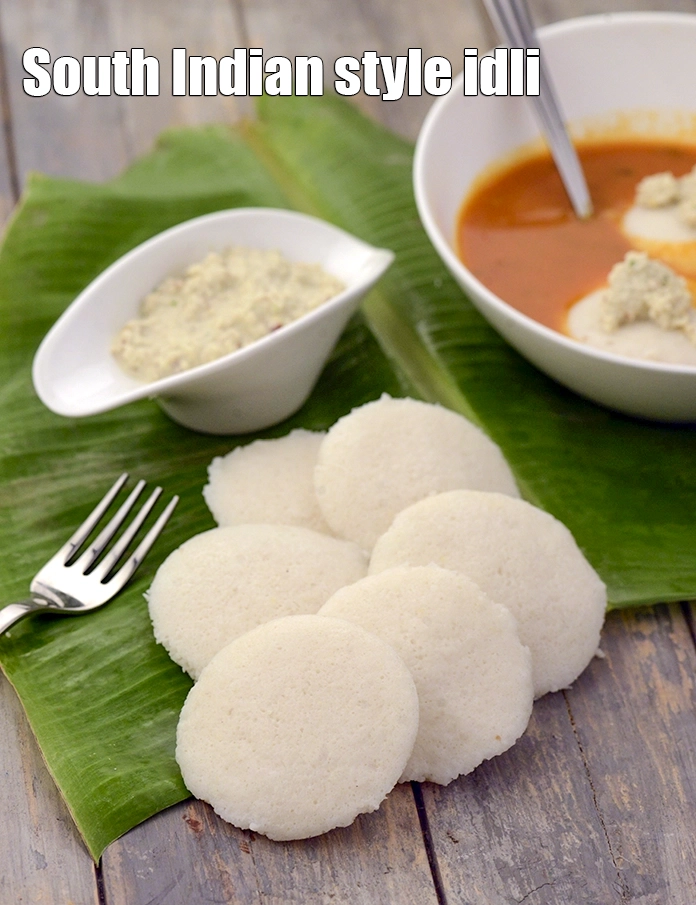
idli recipe | idli batter recipe | South Indian style idli | soft idli | with 30 amazing images.
Idli is a very popular South Indian breakfast which is also a favourite Mumbai Street Food. We show you how to make idli with detailed step by step recipe on how to make the perfect idli batter.
Fluffy as cotton balls, white as the moon’ - every South Indian remembers those fond descriptions of Idli that mom used to convince them to eat breakfast when they were kids.
Indeed, that is how the perfect Idli must be too. Grinding of batter and the preparation of Idli is an almost daily affair in South Indian homes. Being a safe, tasty and wholesome breakfast, it is preferred by people all over the world now.
The procedure to make idli is long and needs hours of waiting due to fermentation. Yet idli's made at home are healthy and worth the wait. To make idli, combine the urad dal and fenugreek seeds and enough water in a deep bowl and mix well. Cover with a lid and keep aside to soak for 4 hours. Combine the par-boiled rice and thick beaten rice and enough water in a deep bowl and mix well. Cover with a lid and keep aside to soak for 4 hours. Wash and drain the urad dal and fenugreek seeds and blend in a mixer to a smooth paste using approx. 1 cup of water. Transfer the mixture into a deep bowl and keep aside. Wash and drain the par-boiled rice and thick rice flakes and blend in a mixer to a slightly coarse paste using approx. 1½ cups of water. Add this mixture to the urad dal-fenugreek seeds mixture, add the salt and mix very well. Cover it with a lid and keep aside to ferment in a warm place for 12 hours. After fermentation, mix the idli batter well once again and pour spoonfuls of the batter into each of the greased idli moulds. Steam in a idli steamer for 10 to 12 minutes or till they are cooked. Once the idlis are cooked, cool them slightly. Dip a spoon in the water and using this spoon loosen the sides of idli and de-mould them. Keep aside. Serve idli recipe with homemade idli batter hot with sambar, coconut chutney and malgapodi.
Choose good quality par-boiled rice (ask for idli rice, which is small and stout) and urad for making idlis, as the colour and softness of the end product depends on it.
The amount of water to be added when grinding the urad changes according to the quality of the dal, so keep adding little by little till the idli batter is soft and fluffy, and do not make it watery.
After making the required idlis store the remaining batter in the fridge. It remains good for almost a week, and can be used to make Sada Dosa, Uttapa and dainty Appe as well.
Enjoy idli recipe | idli batter recipe | South Indian style idli | soft idli | with detailed step by step recipe photos and video below.
Idli recipe - How to make Idli
Tags
Soaking Time
4 hours
Preparation Time
5 Mins
Cooking Time
40 Mins
Baking Time
0 Mins
Baking Temperature
0
Fermenting Time
12 hours
Total Time
45 Mins
Makes
50 idlis
Ingredients
For Idli
1/2 cup urad dal (split black lentils)
1 tbsp fenugreek (methi) seeds
2 cups parboiled rice (ukda chawal)
3 tbsp thick beaten rice (jada poha)
salt to taste
For Serving With Idli
Method
For idli
- Combine the urad dal and fenugreek seeds and enough water in a deep bowl and mix well. Cover with a lid and keep aside to soak for 4 hours.
- Combine the par-boiled rice and thick beaten rice and enough water in a deep bowl and mix well. Cover with a lid and keep aside to soak for 4 hours.
- Wash and drain the urad dal and fenugreek seeds and blend in a mixer to a smooth paste using approx. 1 cup of water. Transfer the mixture into a deep bowl and keep aside.
- Wash and drain the par-boiled rice and thick rice flakes and blend in a mixer to a slightly coarse paste using approx. 1½ cups of water. Add this mixture to the urad dal-fenugreek seeds mixture, add the salt and mix very well.
- Cover it with a lid and keep aside to ferment in a warm place for 12 hours.
- After fermentation, mix the batter well once again and pour spoonfuls of the batter into each of the greased idli moulds.
- Steam in an idli steamer for 10 to 12 minutes or till they are cooked.
- Once the idlis are cooked, cool them slightly. Dip a spoon in the water and using this spoon loosen the sides of idli and demould them. Keep aside.
- Repeat with the remaining batter to make more idlis.
- Serve the idlis hot with sambhar, coconut chutney and malgapodi.
idli recipe | idli batter recipe | South Indian style idli | soft idli | Video by Tarla Dalal
Idli recipe with step by step photos
-
- What are Idlis? Idli is considered to be one of the healthiest breakfasts in Indian cuisine. Although it is traditionally a South Indian snack, it has now become extremely popular all over the country – and with good reason too. Idli is a steamed food, made with with a fermented batter of rice, urad dal and fenugreek seeds. White and fluffy, it is a delight to bite into. It has a mellow flavour, which gives scope for the accompaniment to shine. Idli is a standard South Indian breakfast item in the South, supplemented with a small quantity of some other dish. What varies is the accompaniment. Usually, Idli is served with Sambar and one or more chutneys such as Coconut Chutney, Coriander Chutney or Tomato Chutney. When in a hurry, the Idli is served with dry chutney powders like Idli Milagai Podi, Coconut Powder or Curry Leaves Powder.
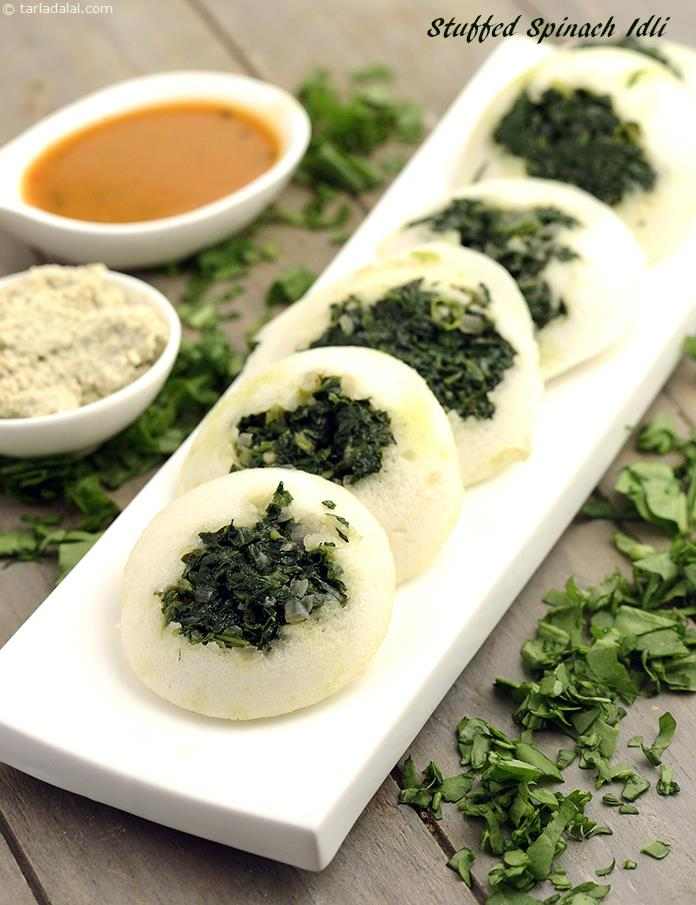
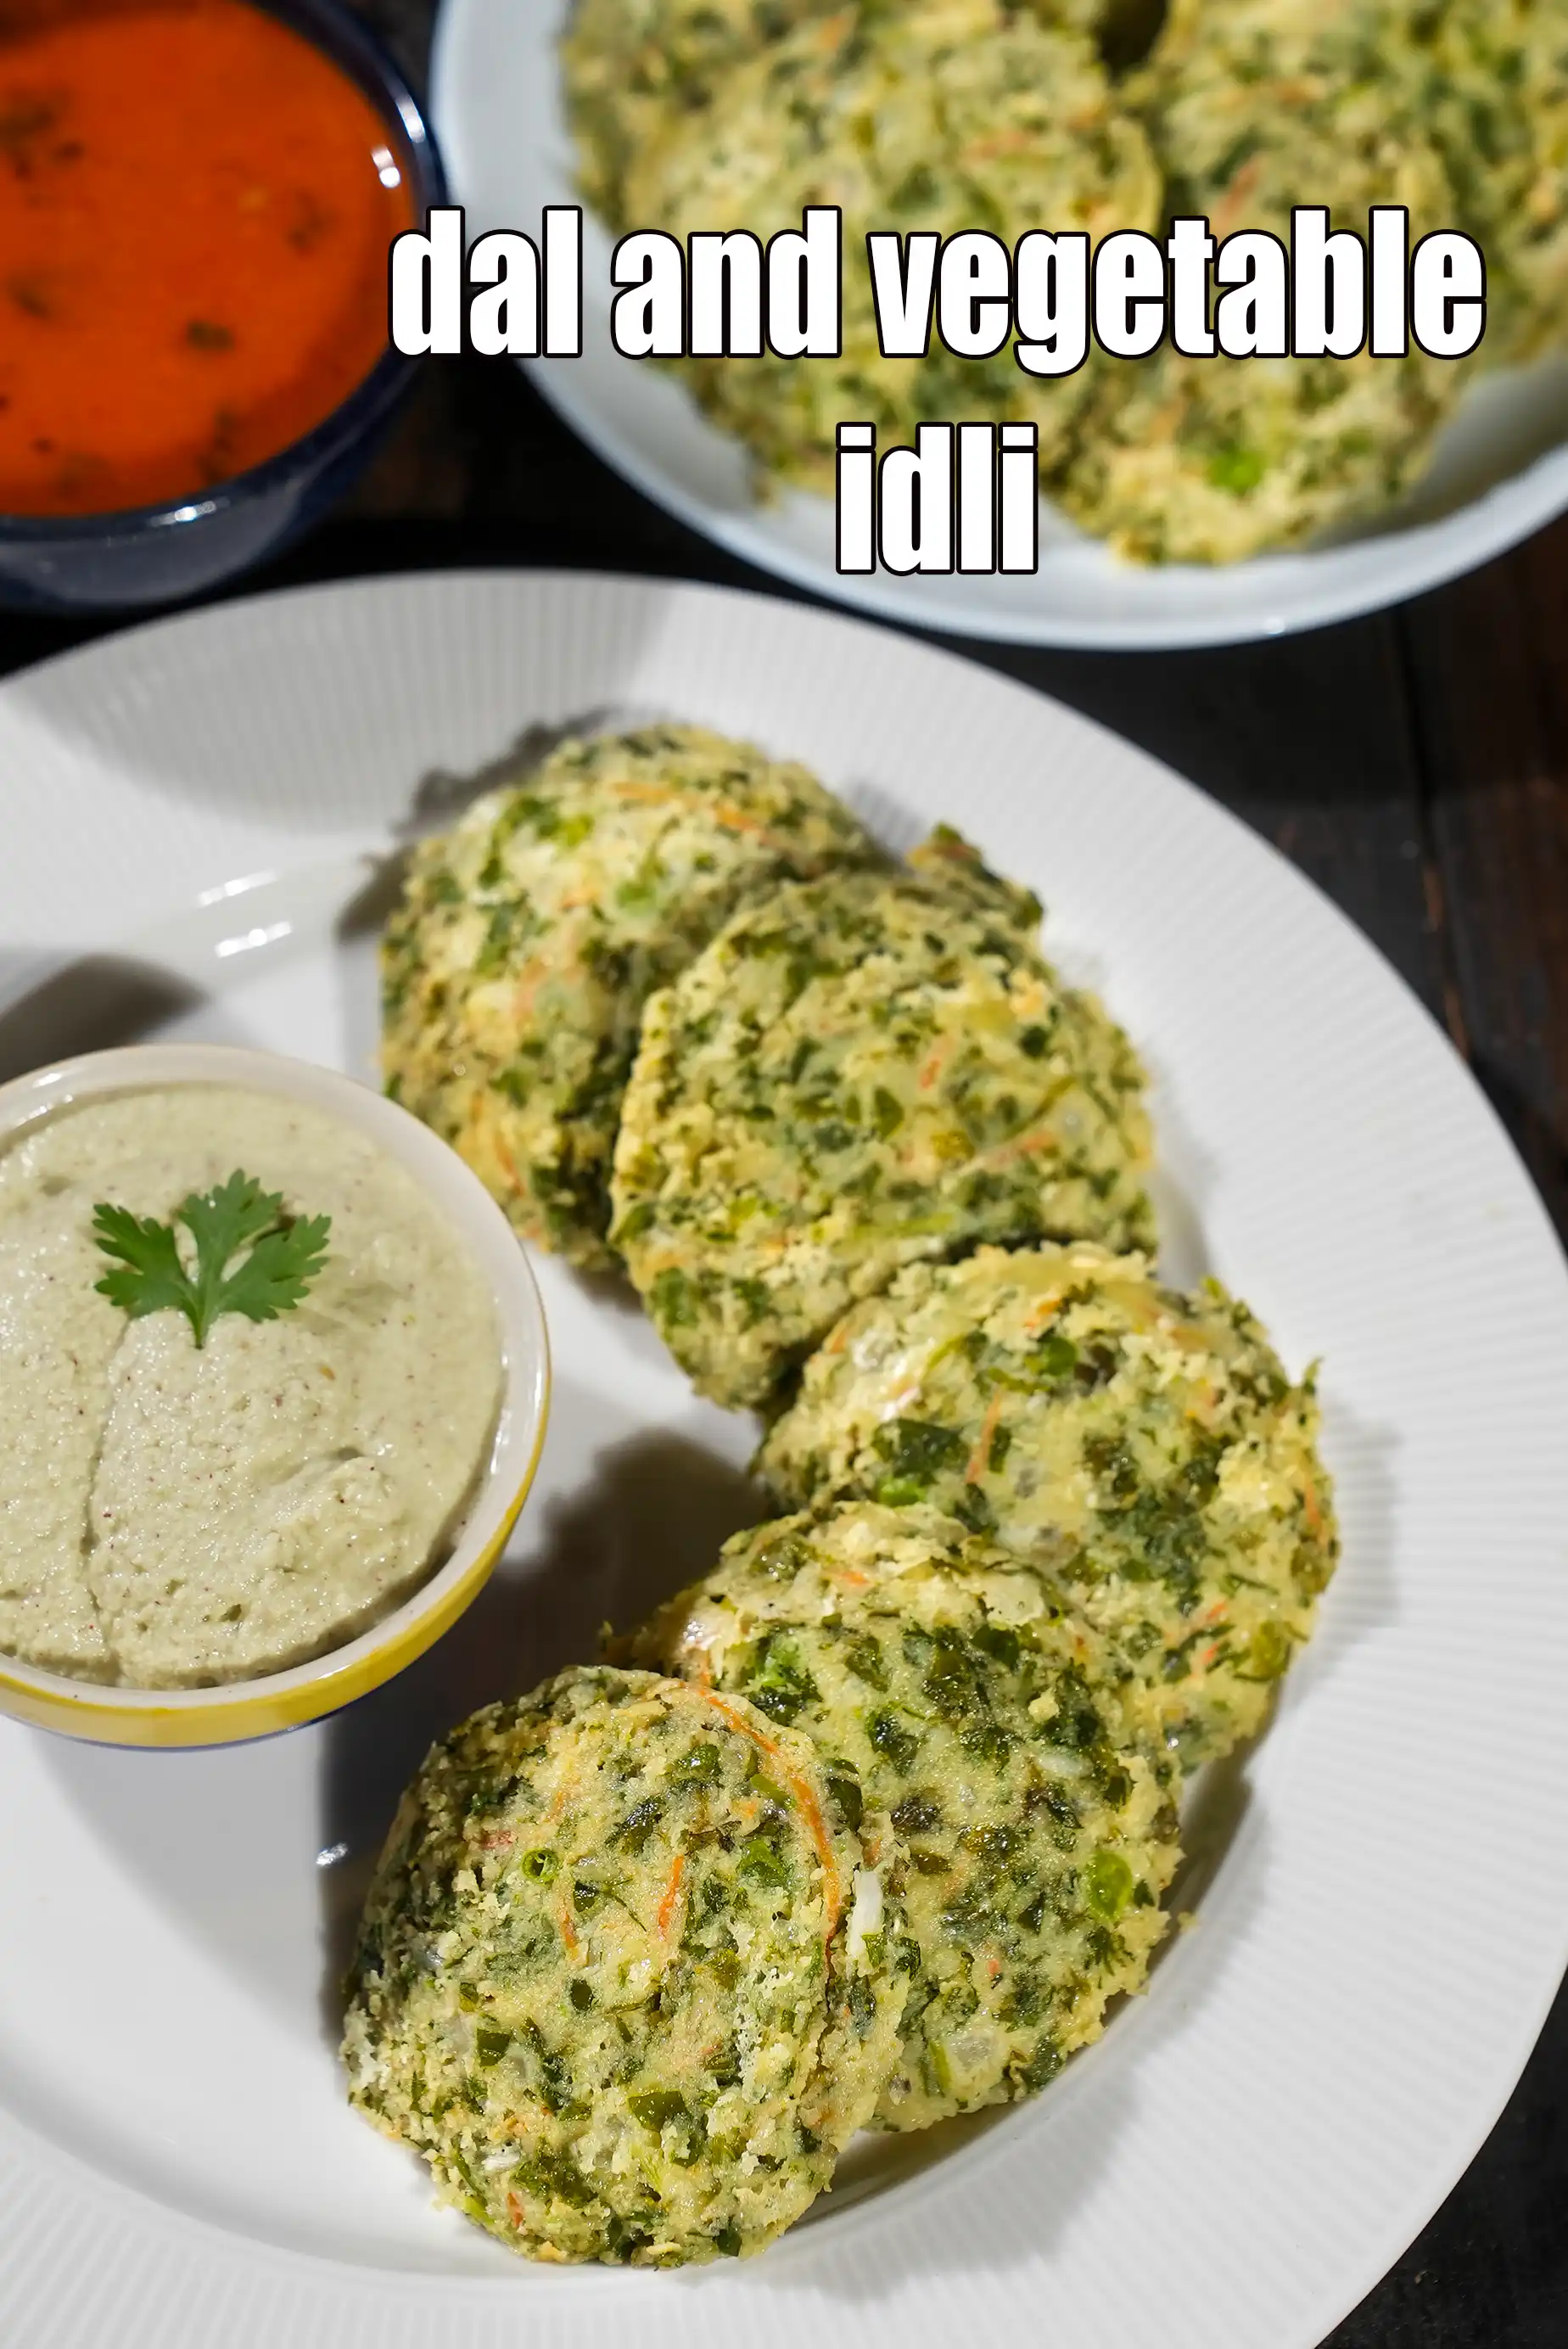
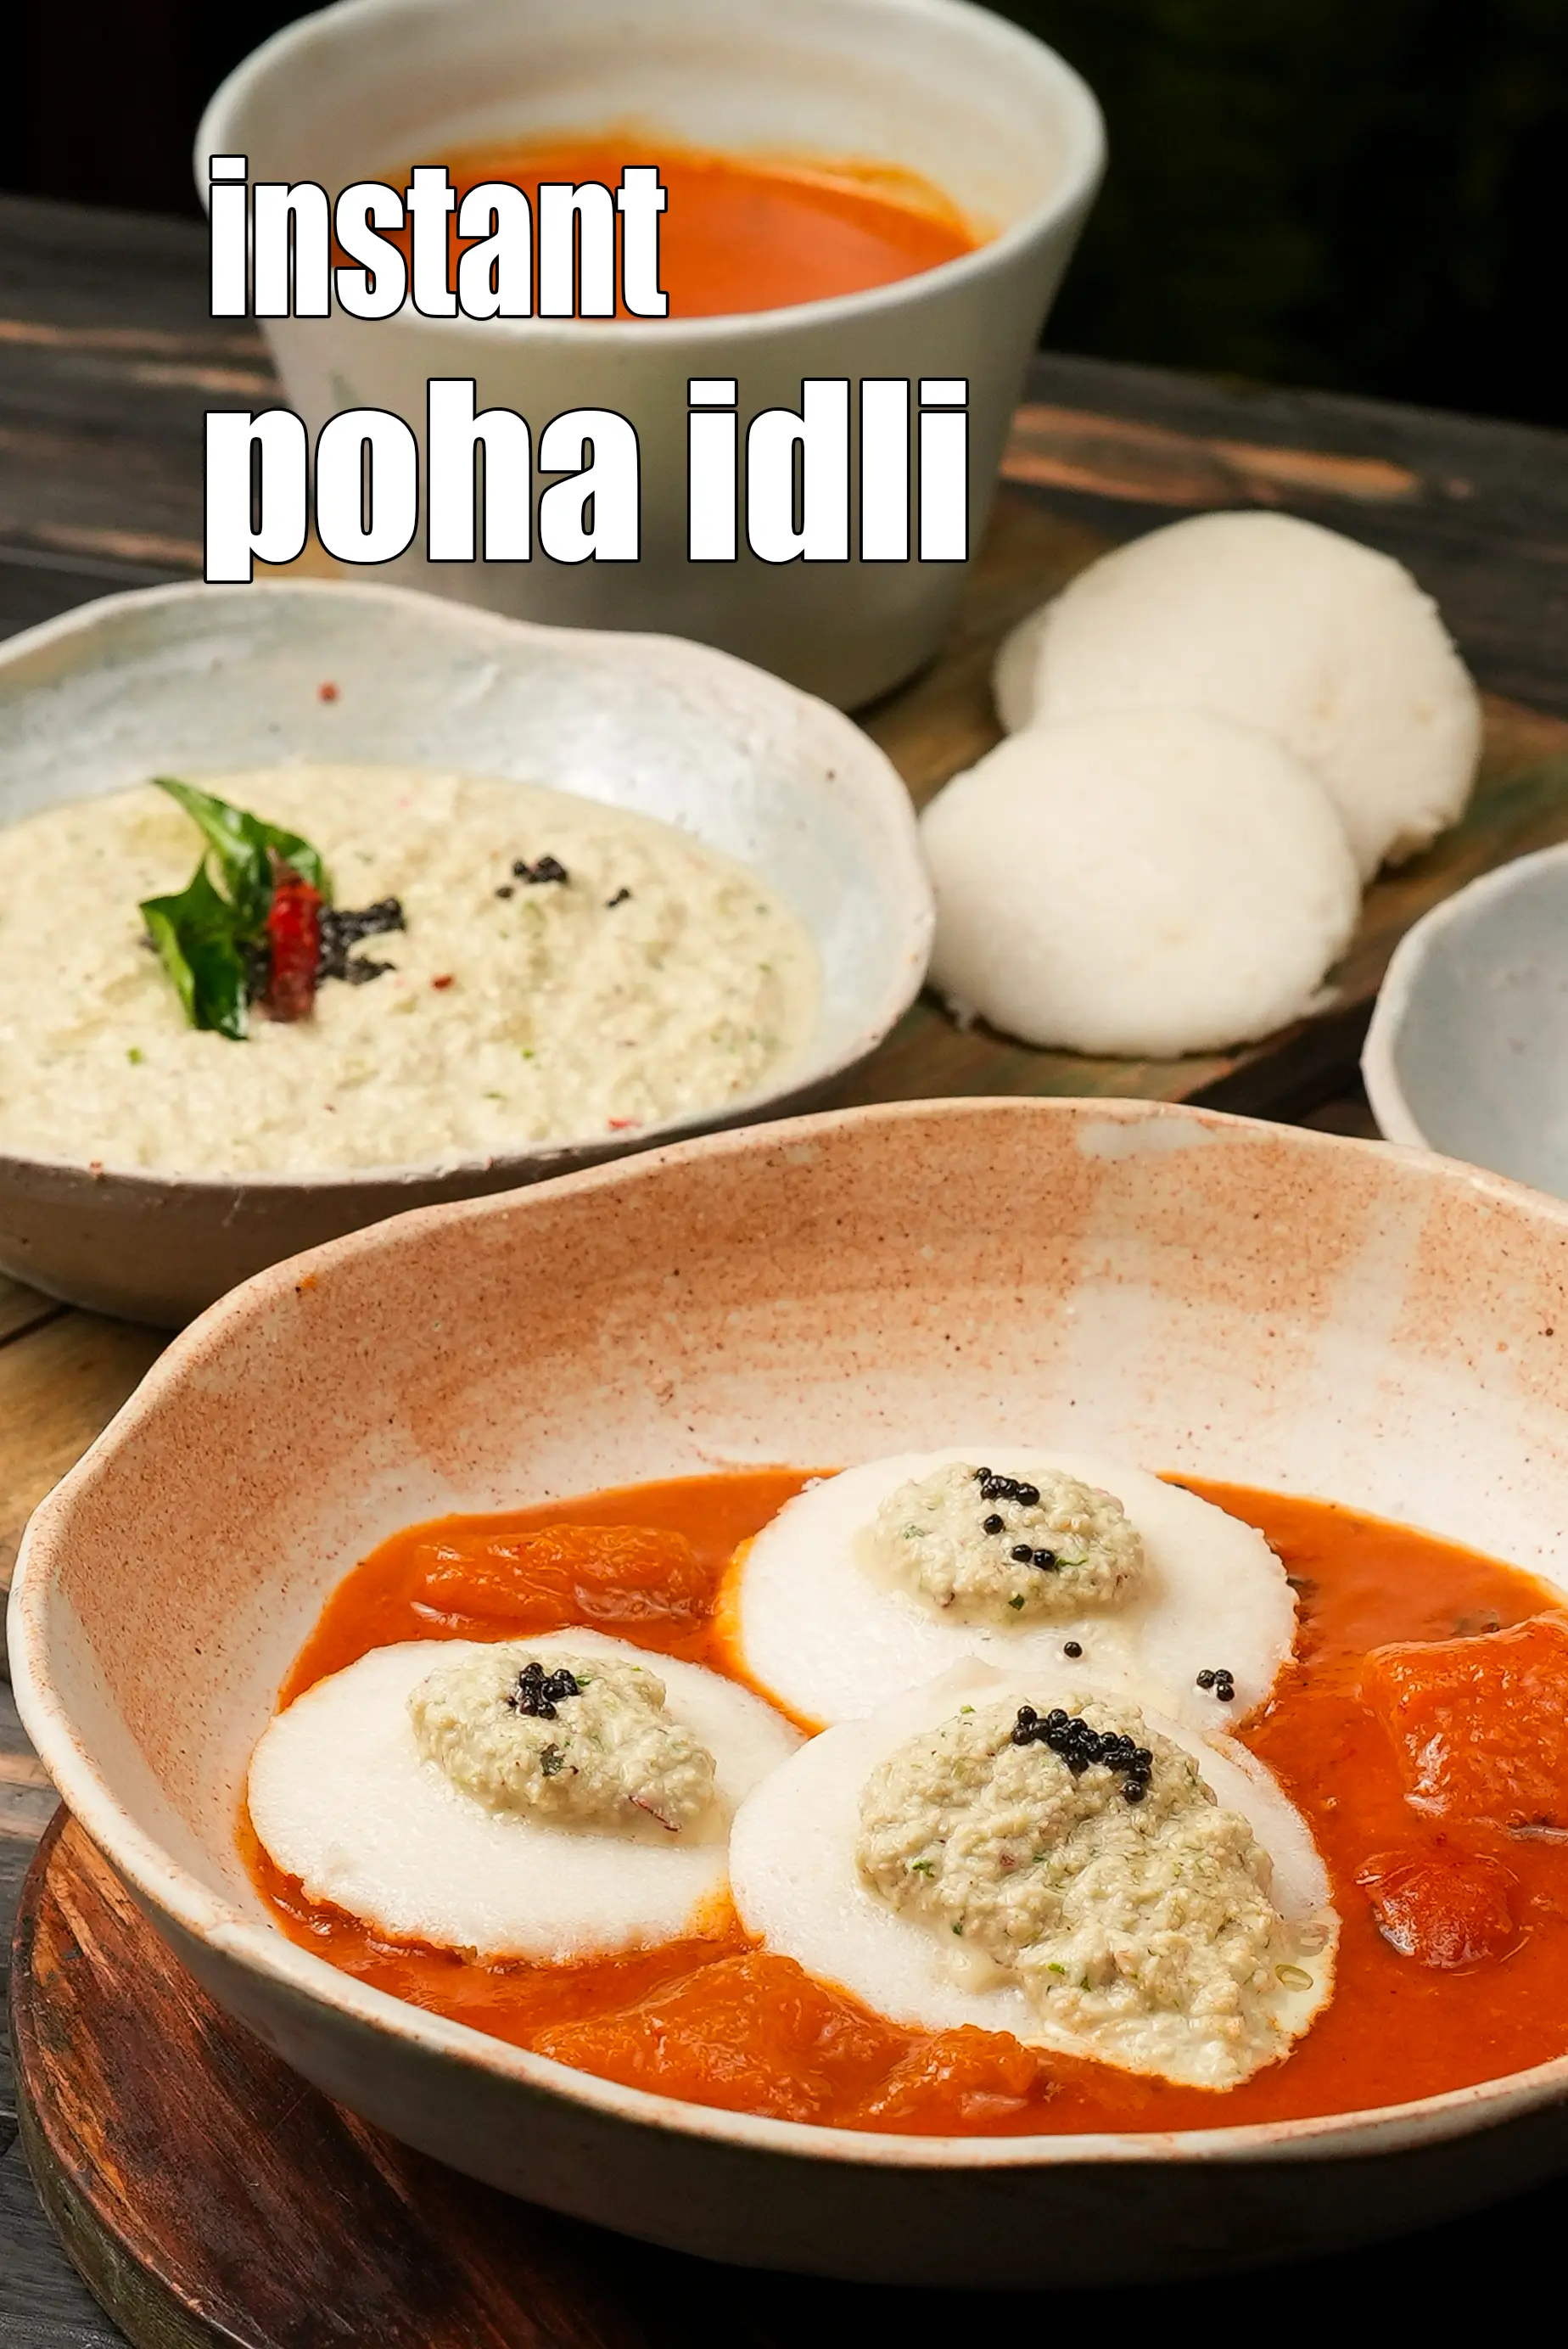
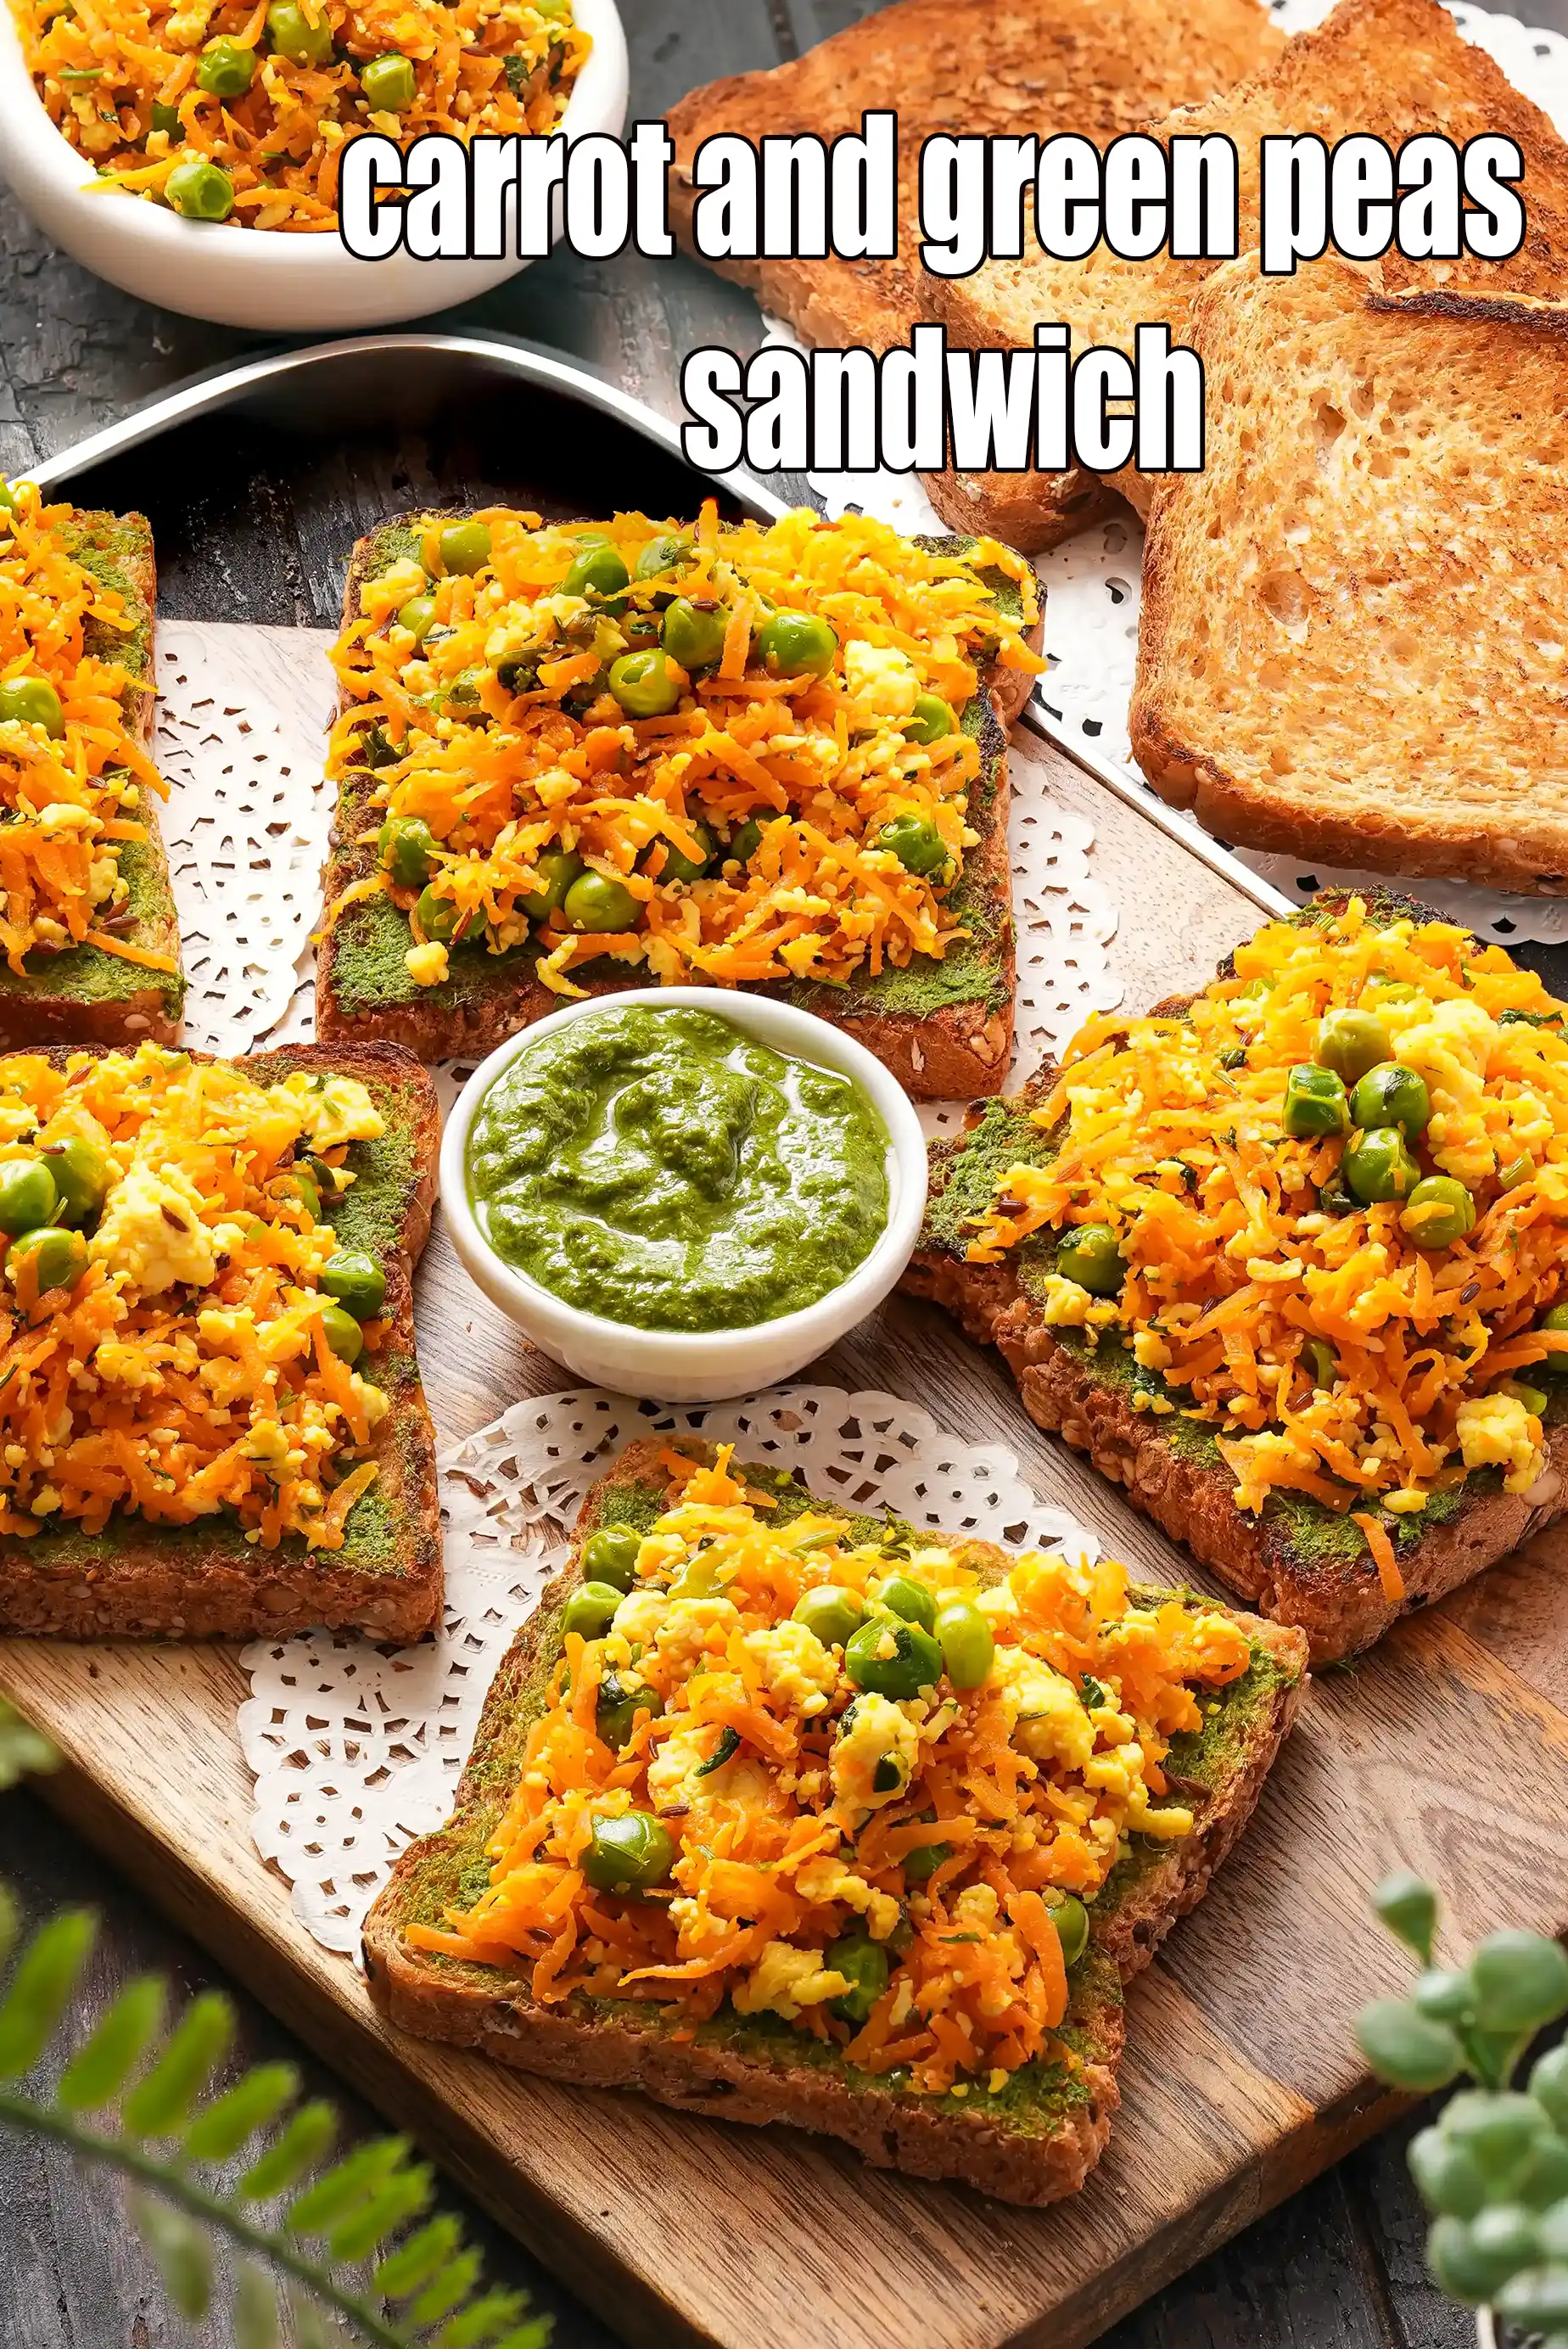
- There are different variants of Idli, made using different combinations of grains and lentils. You can try the Rice and Moong Dal Idli, Barley Idli, Poha Idli, Cooked Rice Idli and Palak Moong Dal Idli. Likewise, you can also add spices, herbs and veggies to the idli batter to make variants such as the Kanchipuram Idli and Paneer Vegetable Idli. Not all idlis require you to soak, grind and ferment the batter. You can also make Instant Idli recipes like you make Instant Dosas and Instant Dhoklas. The most famous example of a quick and instant idli is the Rava Idli or Suji Idli. Vermicelli Nut Idli and Palak Rava Idli extend the idea of quick Suji Idli with exciting twists! Instant Bread Idli and Dal Vegetable Idli are other instant idlis worth a try.
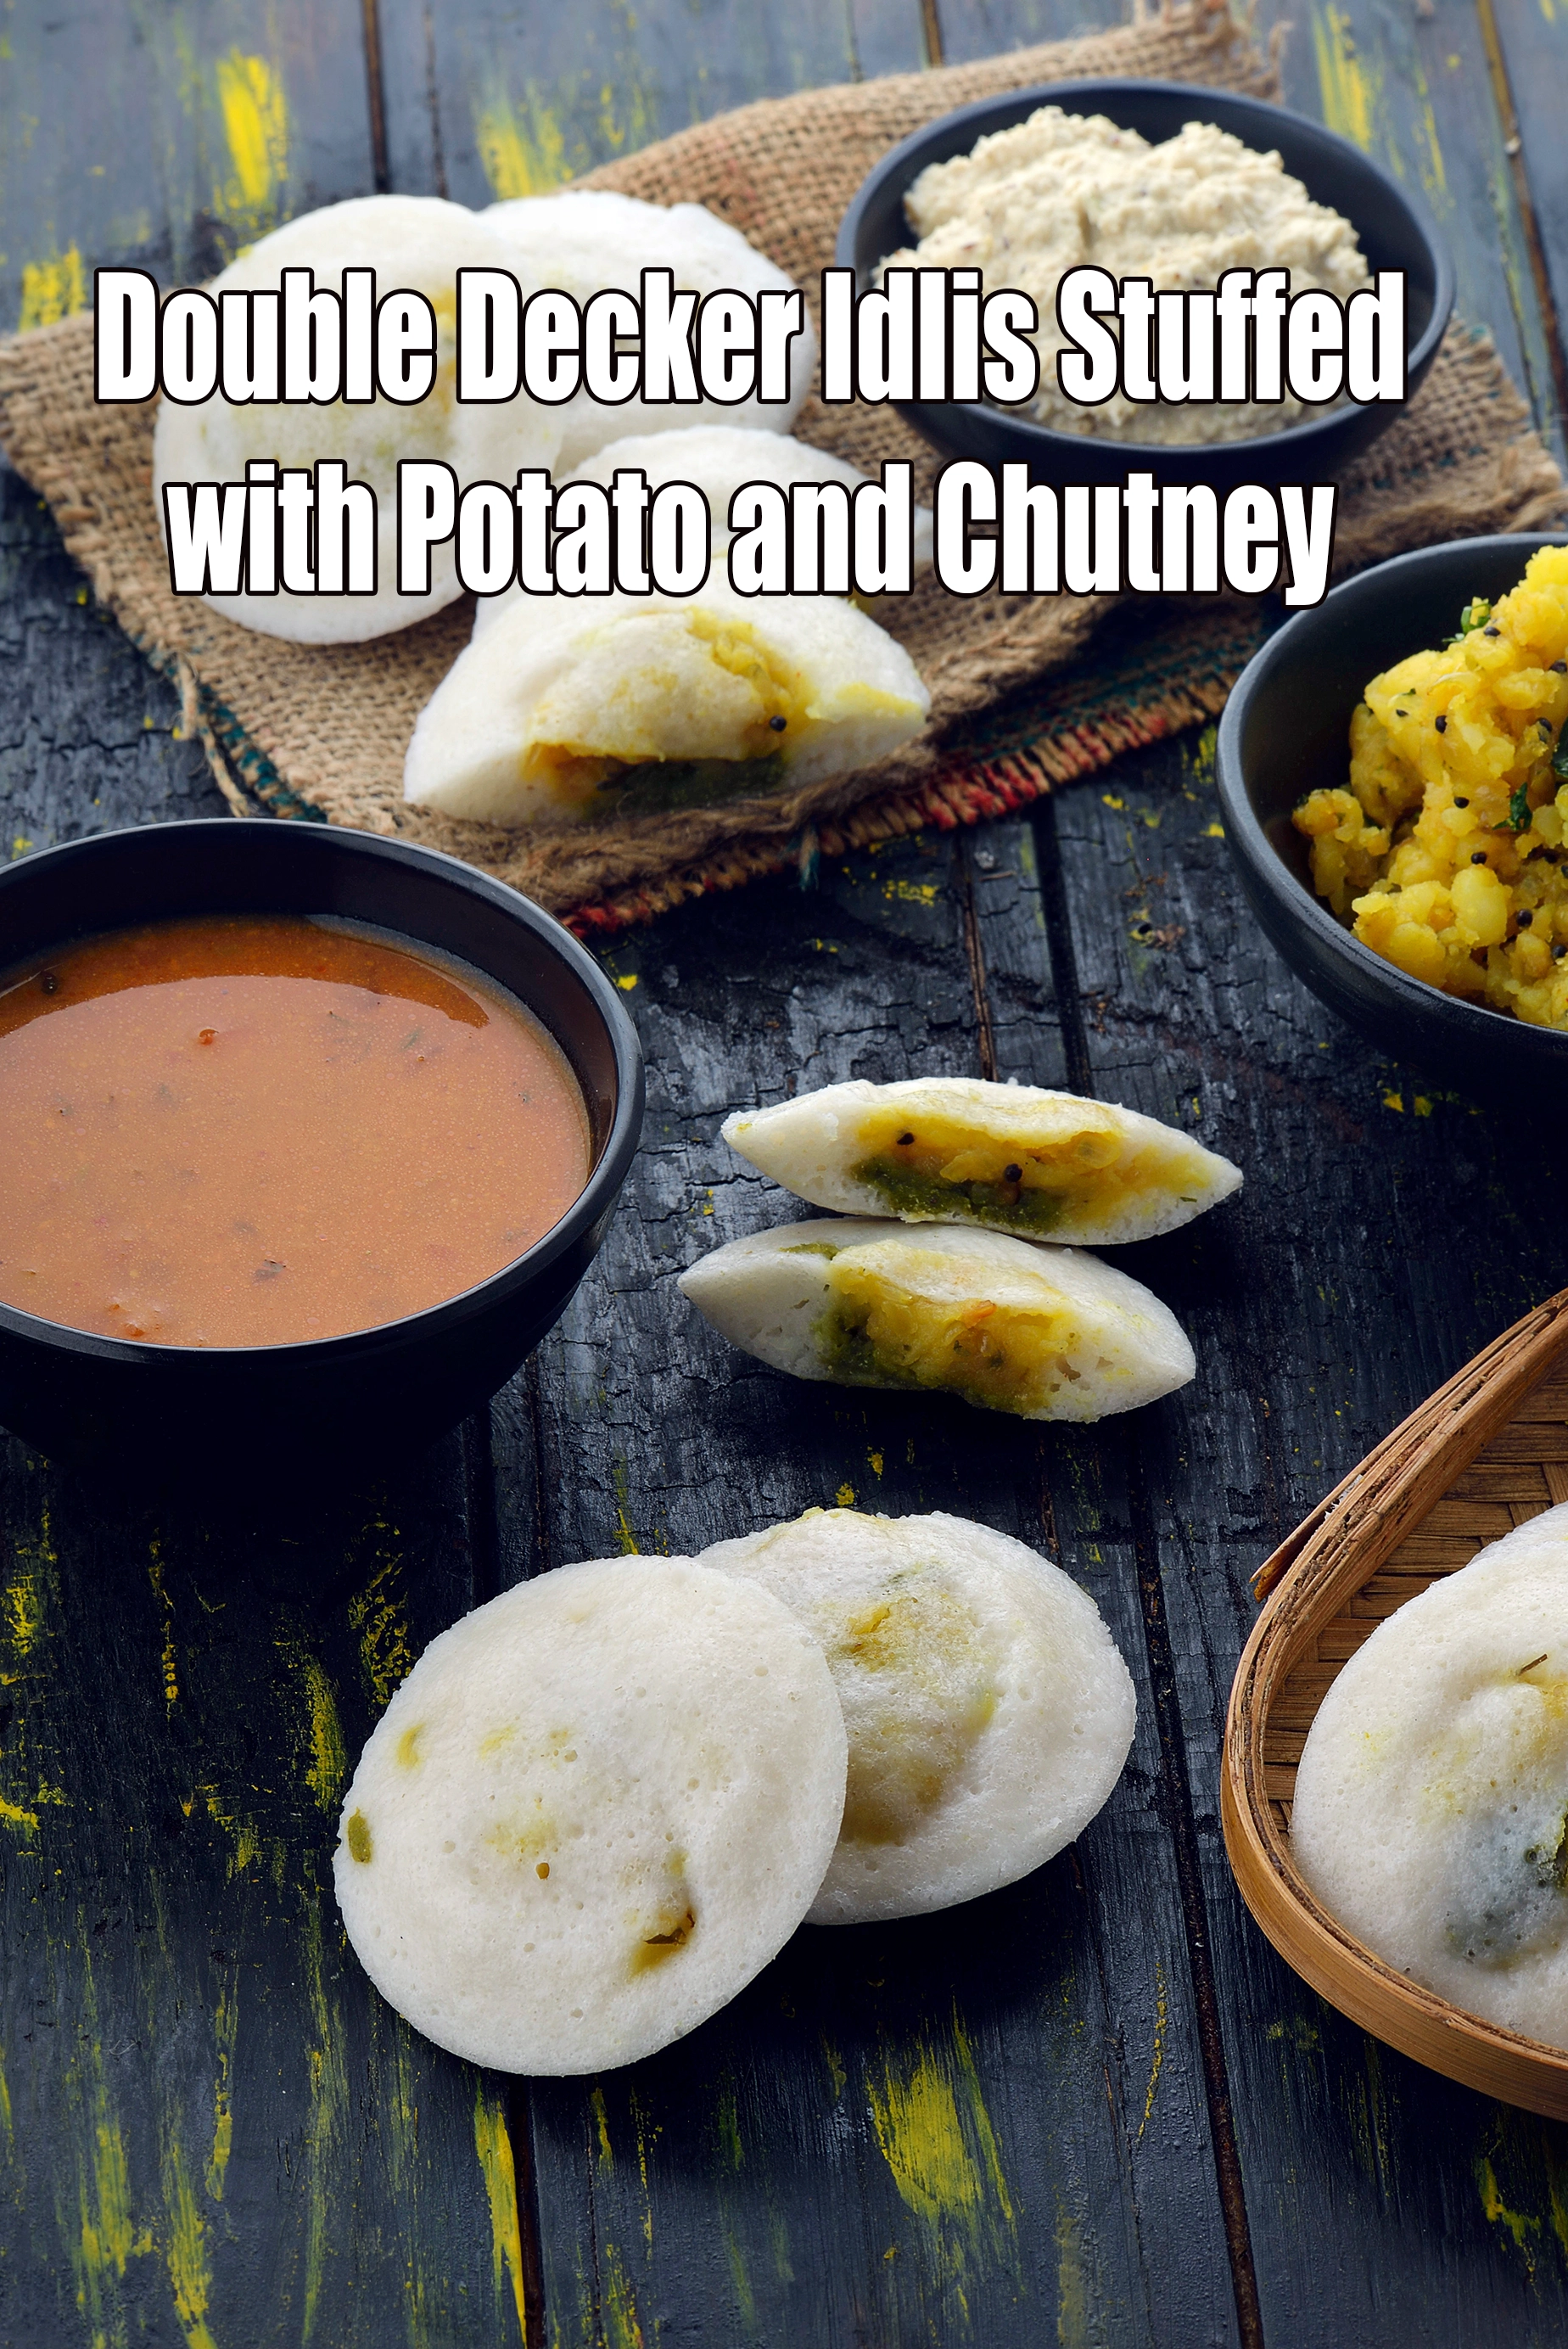
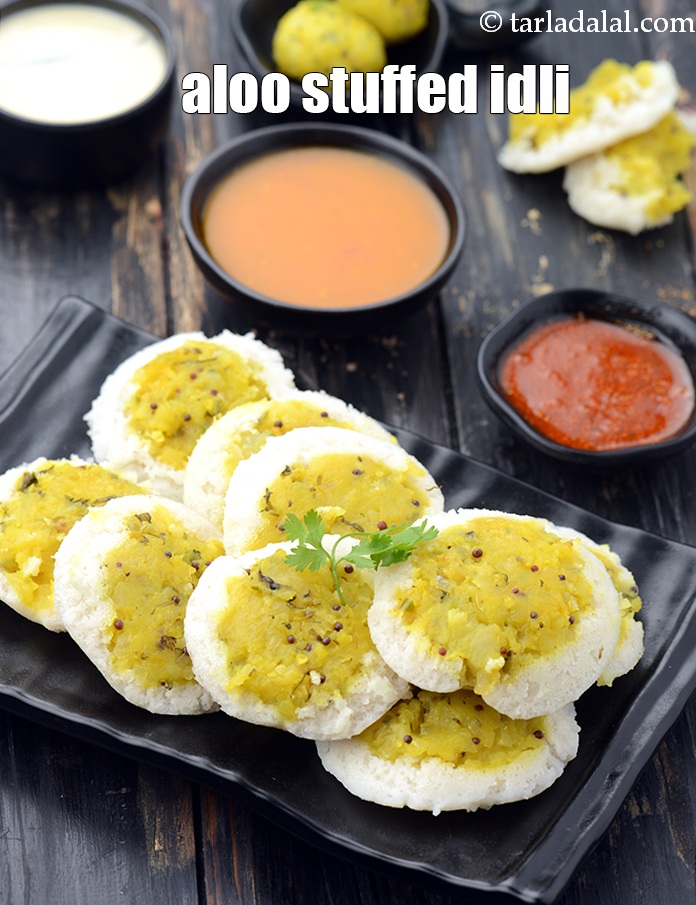
- Like dosas and chapatis, idlis can also be stuffed with exciting fillings! Try the Stuffed Potato Idli and Double Decker Idlis Stuffed with Potato and Chutney. Such idlis make wonderful evening snacks. Treat your kids to the Stuffed Rava Idli Vegetable Sandwich when they come home from school and watch them finish it off without any fuss!
- If you have some idli batter on hand, it becomes very easy to quickly conjure up a meal for your family. Idli can be served not just for breakfast, but also as an evening snack or for dinner, depending on the form it is cooked in and what it is served with. Regular Idli stays soft and fluffy for a long time if made properly. It can be carried in the dabba, or even taken along while travelling. Just smear a little oil on the idlis and coat them with Idli Milagai Podi, and it becomes a one-dish meal that is handy to eat on-the-go!
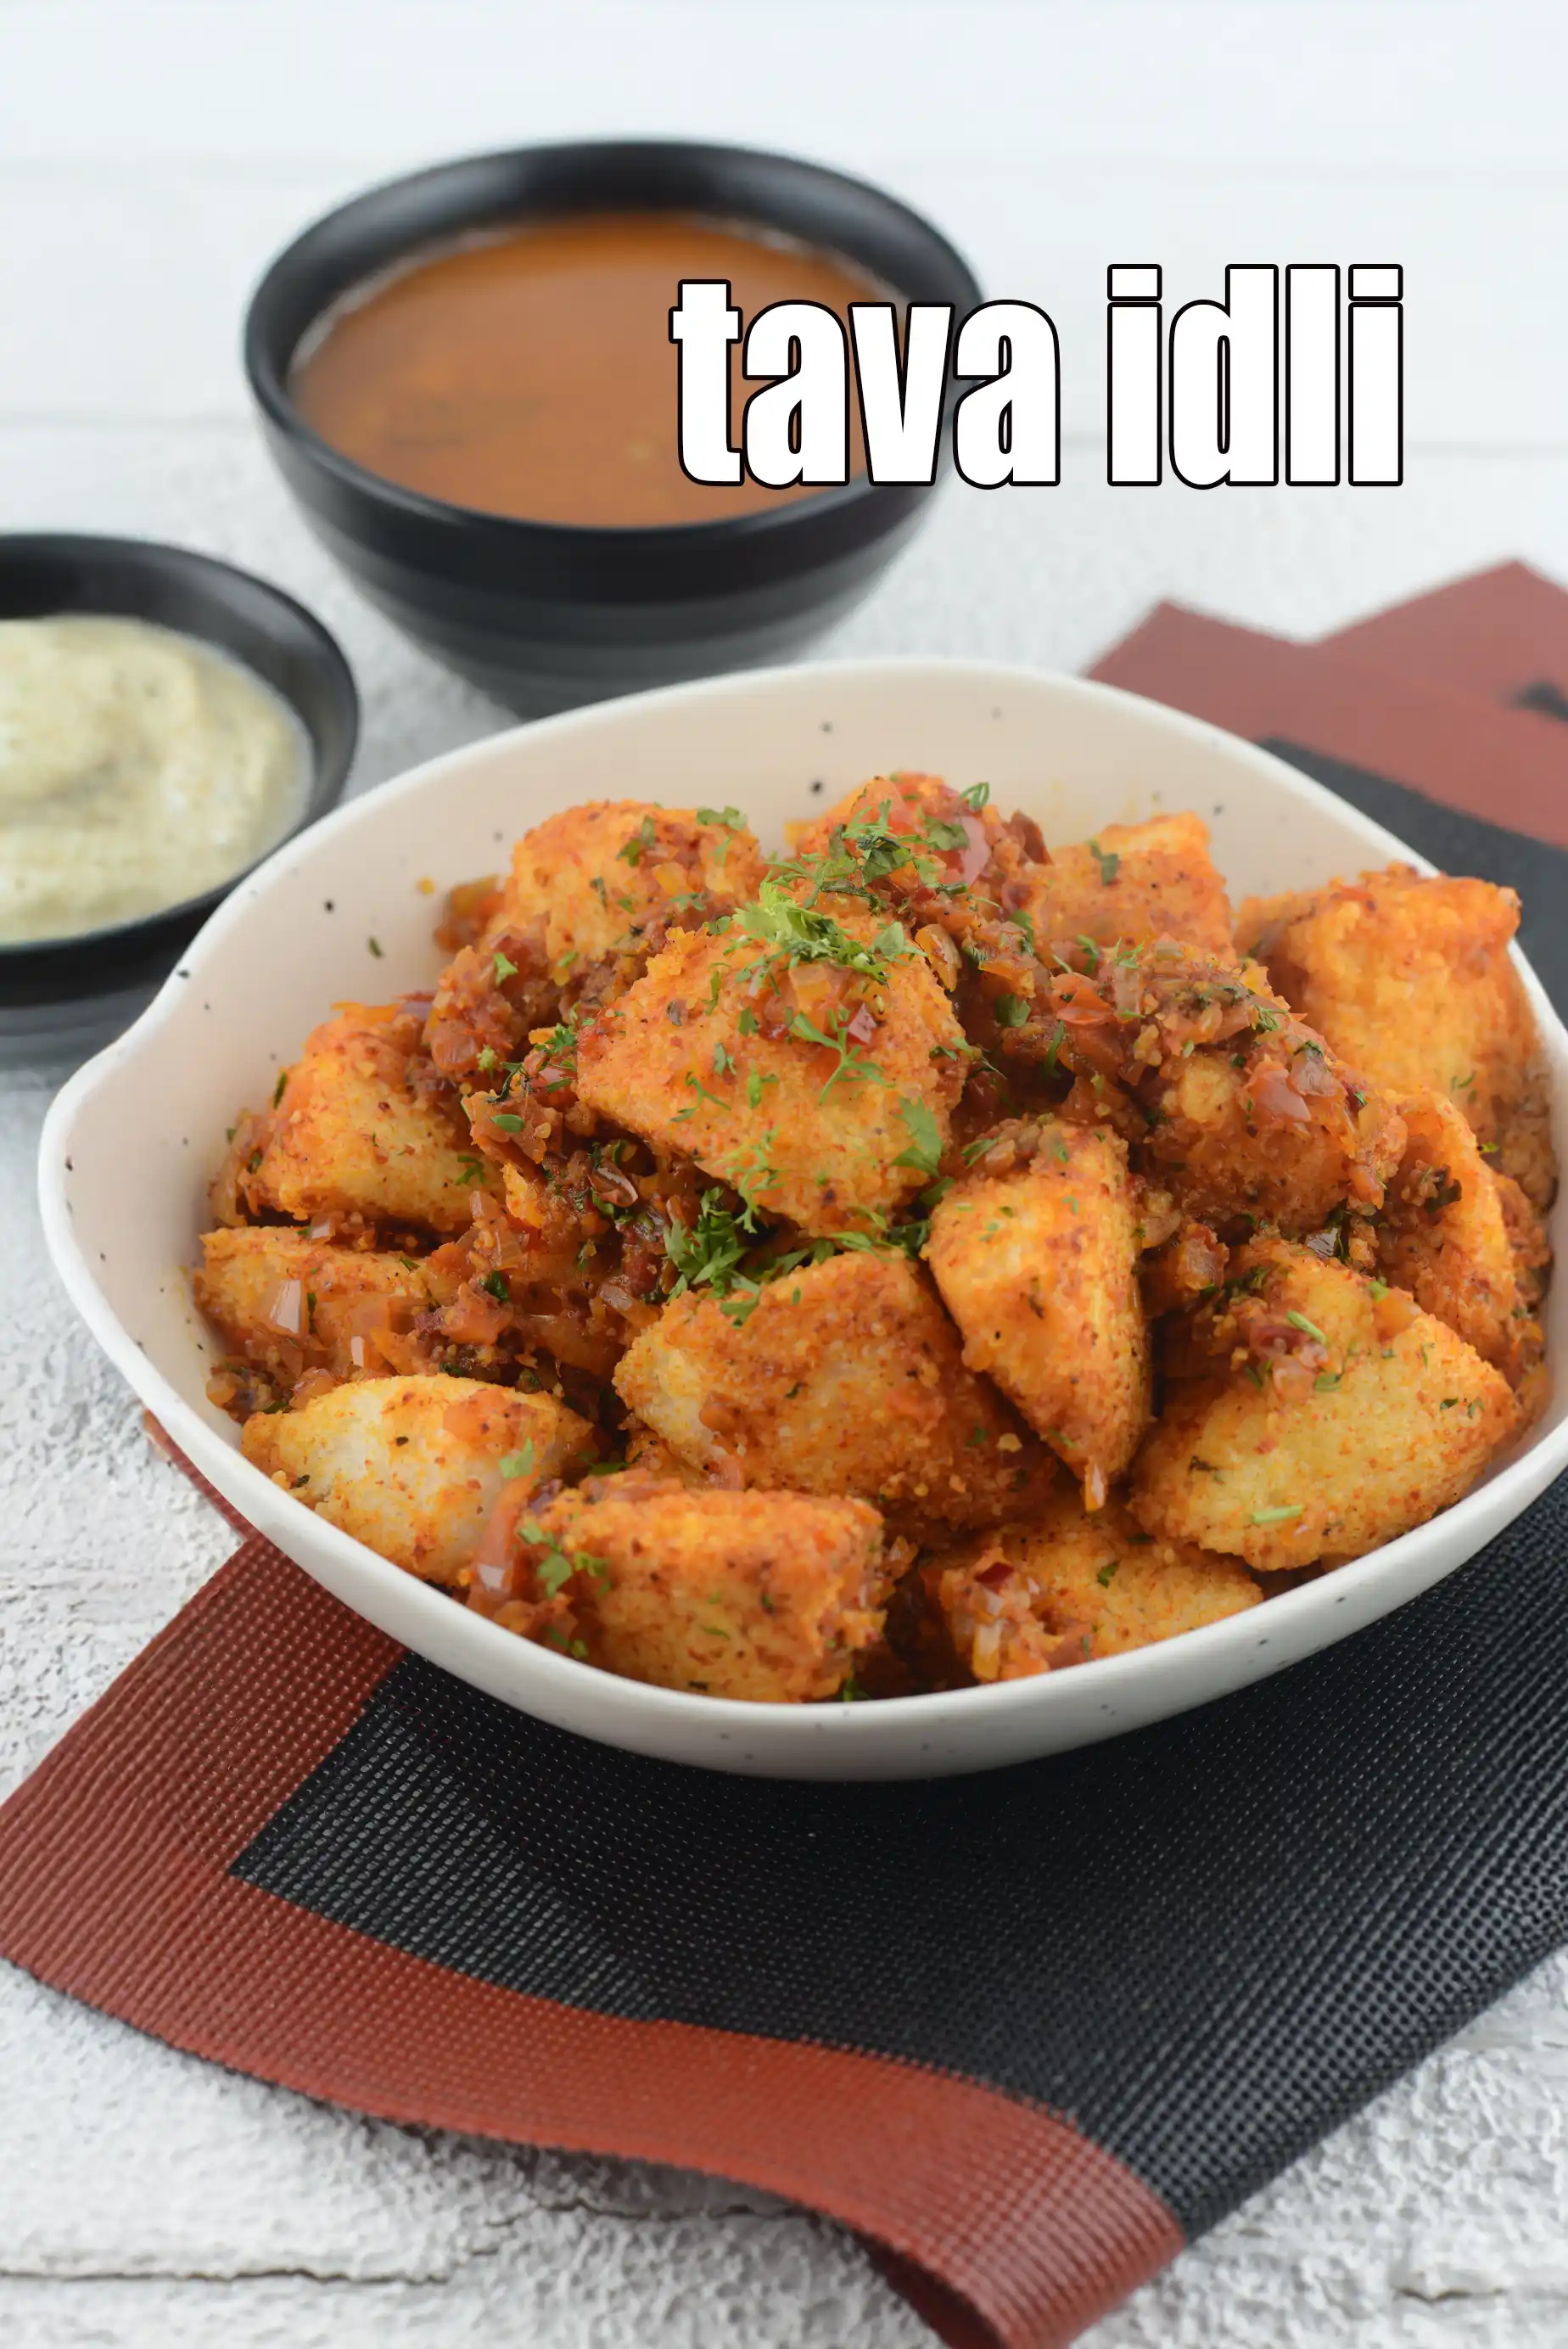
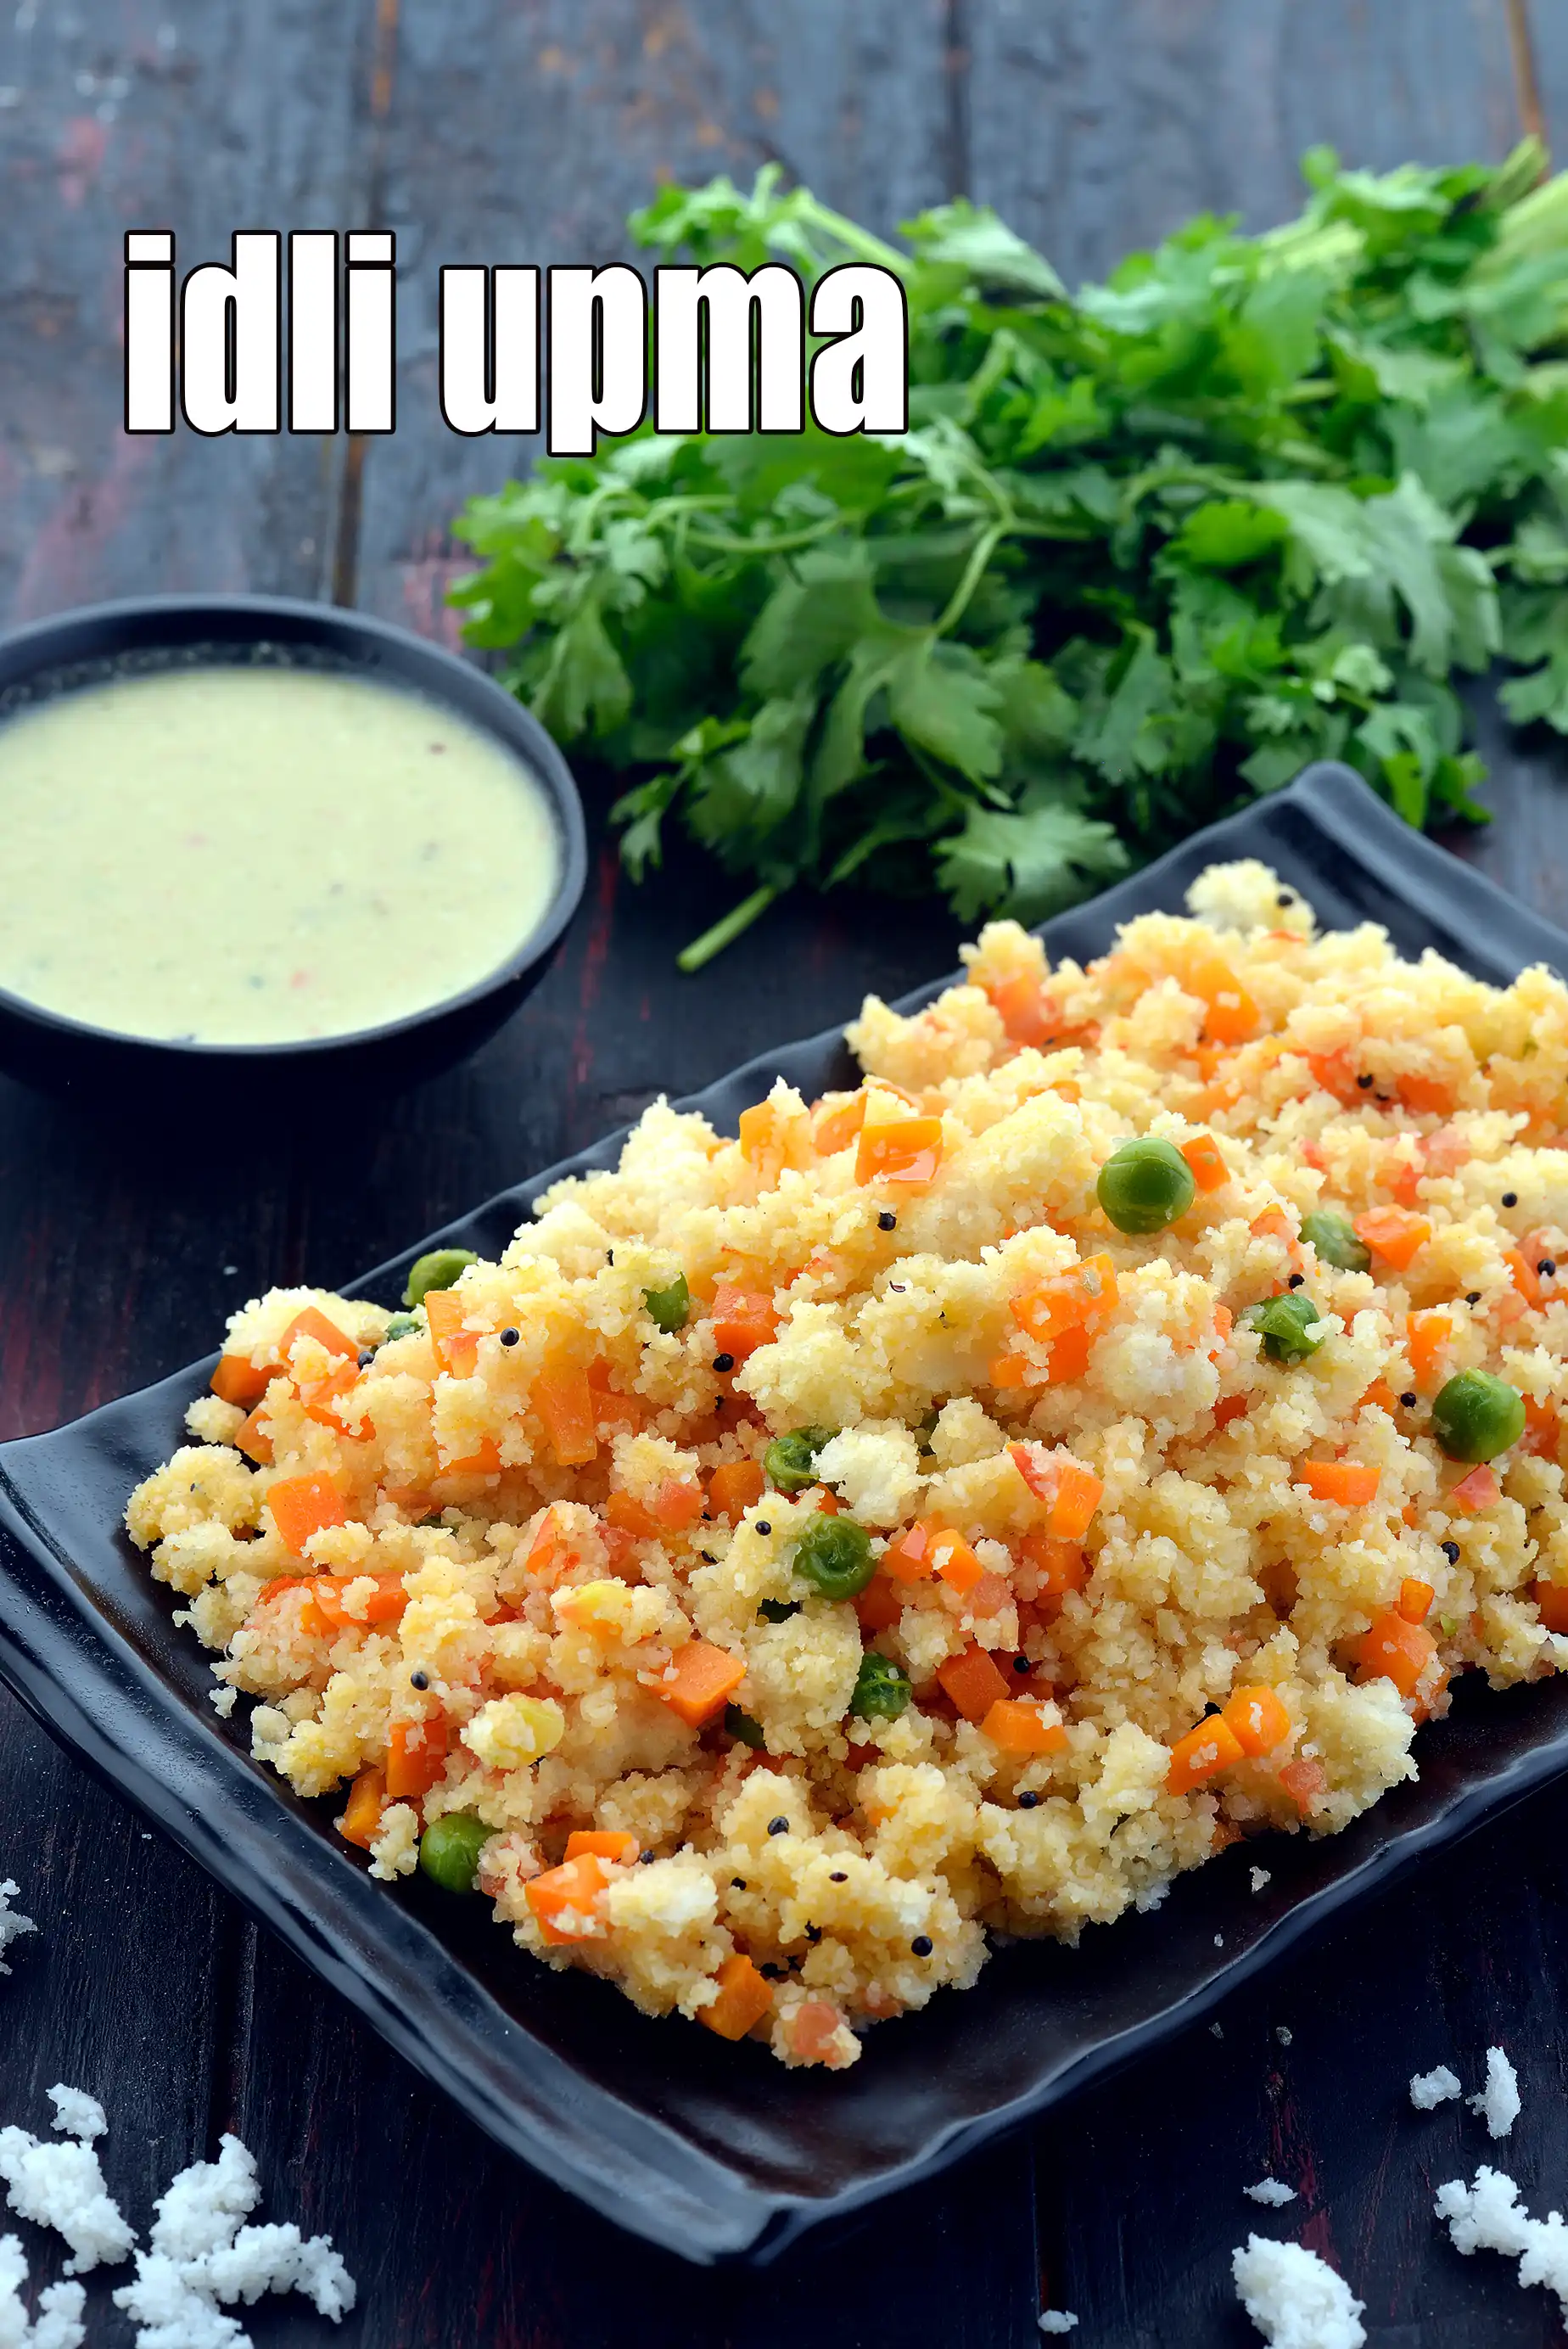
- You can use your idli batter to make other snacks like Dosa and Appe. You can also turn your leftover idlis into exciting munchies like the Idli Upma or Spicy Tava Idli! See, a jar of idli batter in the fridge makes life so easy!
-
-
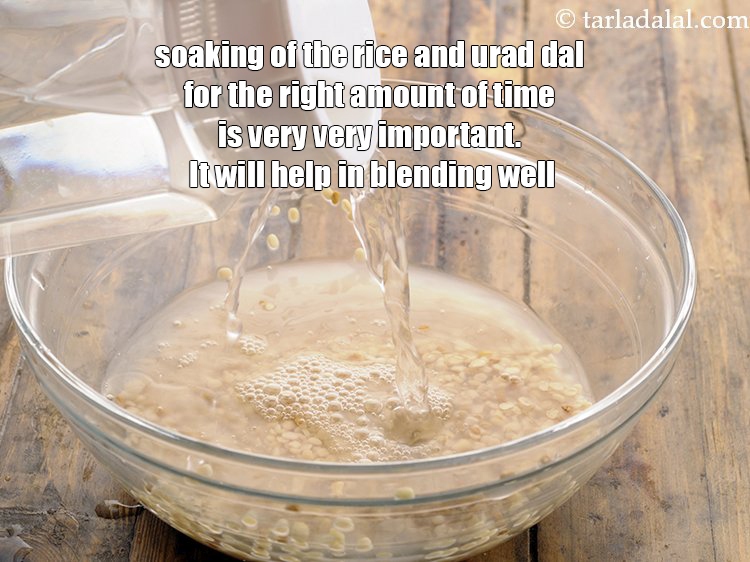
To make idli recipe | South Indian style idli | soft idli | soaking of the rice and urad dal for the right amount of time is very very important. It will help in blending well.
![]()
-
While blending, make sure to blend it in batches, or else the blender machine, will get heated up.

![]()
-
As this recipe calls for parboiled rice(ukda chawal), it will take a little more time to blend.
-3-187510.webp)
![]()
-
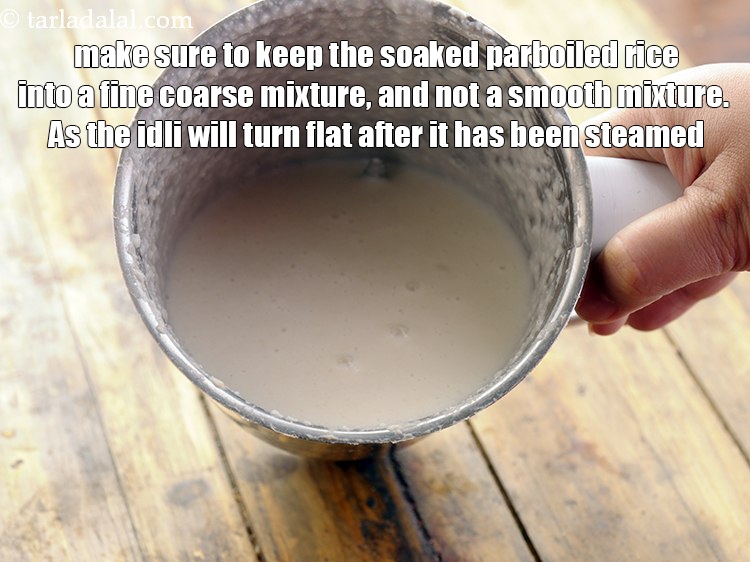
make sure to keep the soaked parboiled rice into a fine coarse mixture, and not a smooth mixture. As the idli will turn flat after it is been steamed.
![]()
-
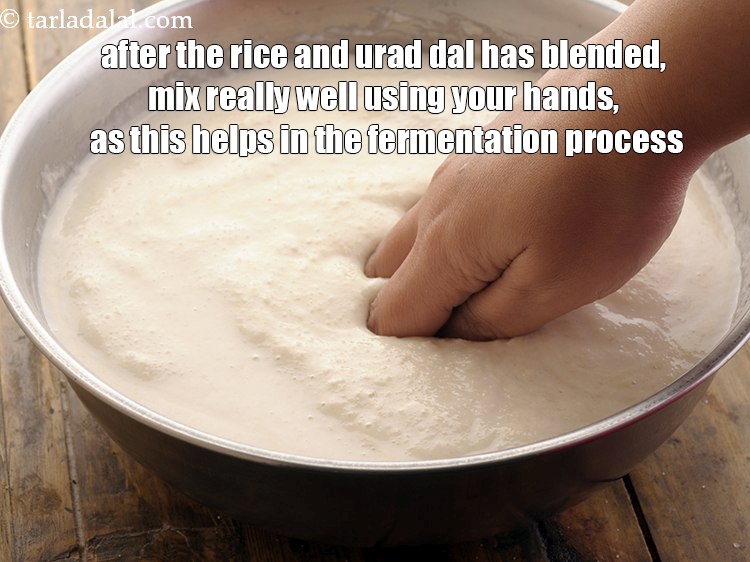
After the rice and urad dal has blended, mix really well using your hands, as this helps in the fermentation process.
![]()
-
After steaming, wait for a few seconds, and then demould the idlis using a wet spoon.
![]()
-
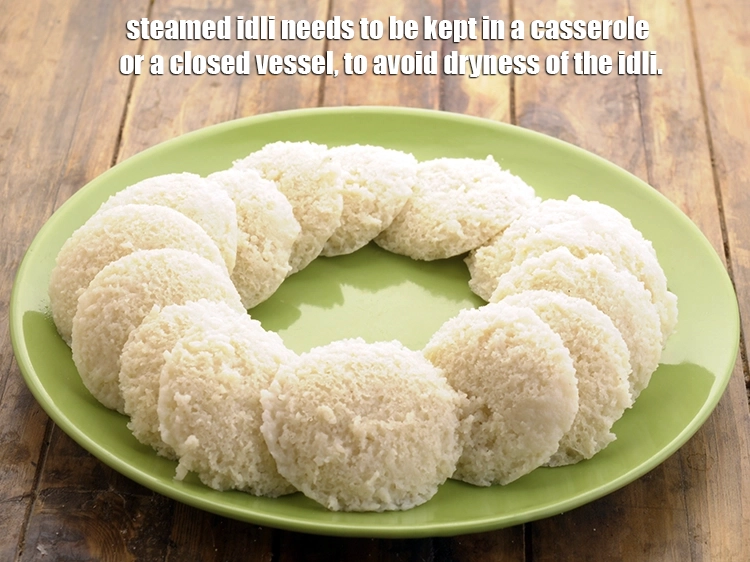
Steamed idli needs to be kept in a casserole or a closed vessel, to avoid dryness of the idli.
![]()
-
-
-
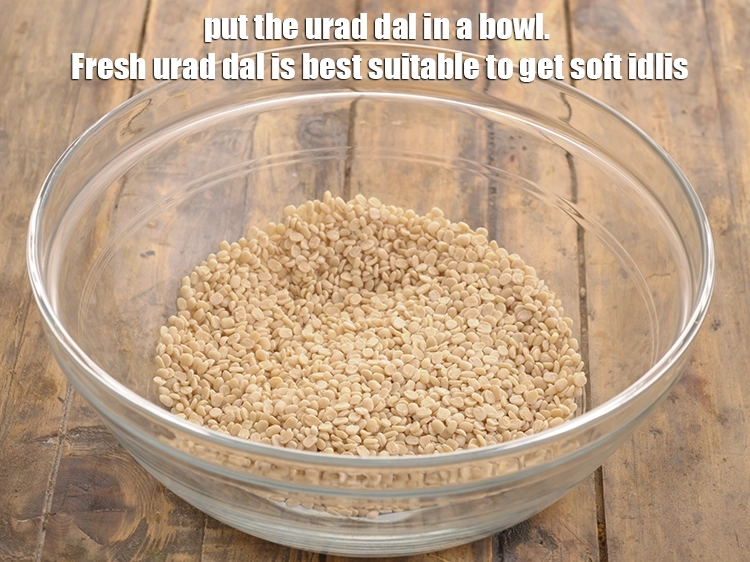
Put the urad dal in a bowl. Fresh urad dal is best suitable to get soft idlis. Current years harvested urad dal will be white in colour without pale yellow shades. So, make use of new urad dal for better fermentation and soft idly.
![]()
-
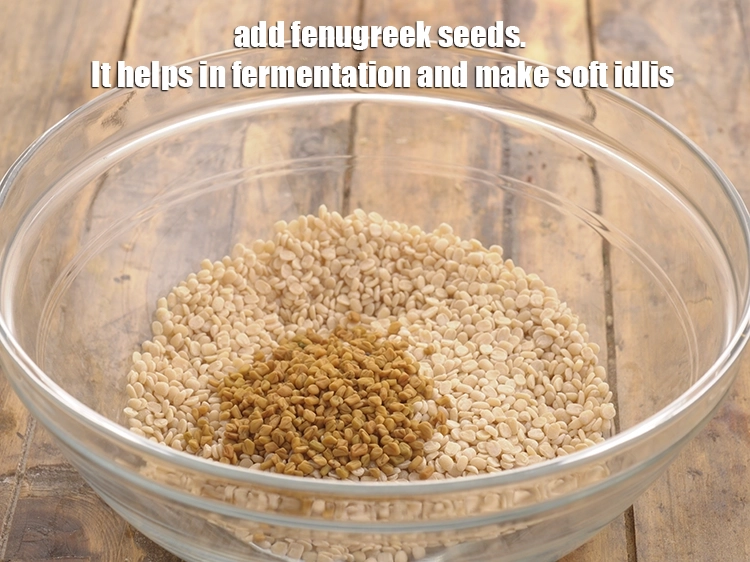
Add fenugreek seeds. It helps in fermentation and make soft idlis in case you do not find current years harvested urad dal.
![]()
-
Add water.
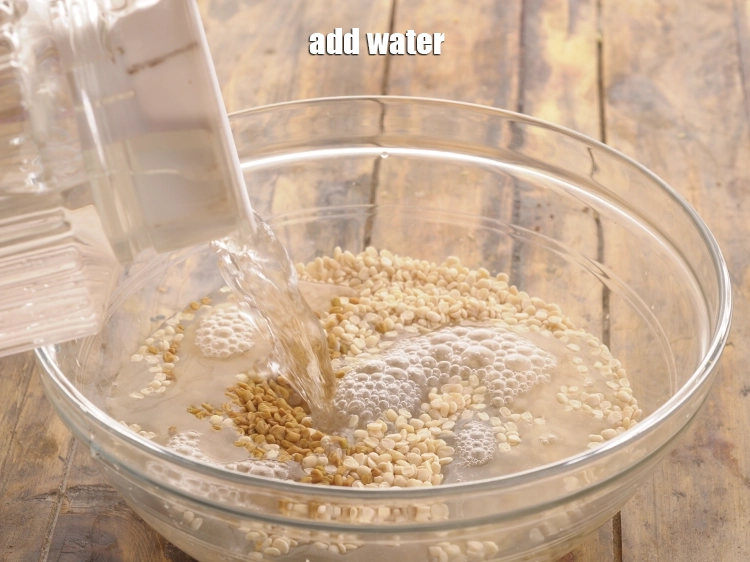
![]()
-
Wash it well.
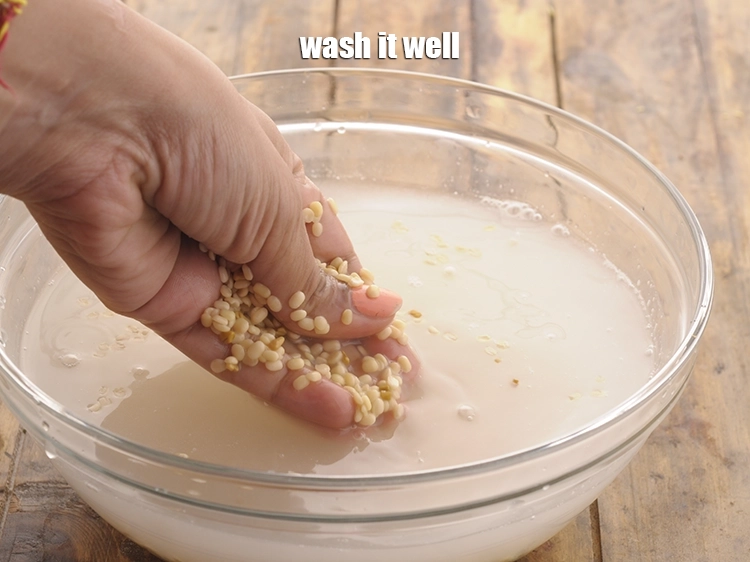
![]()
-
Drain it.
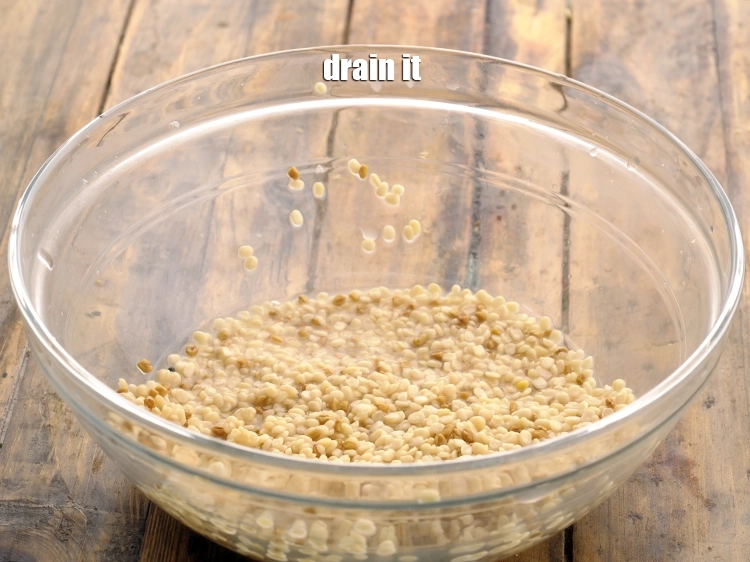
![]()
-
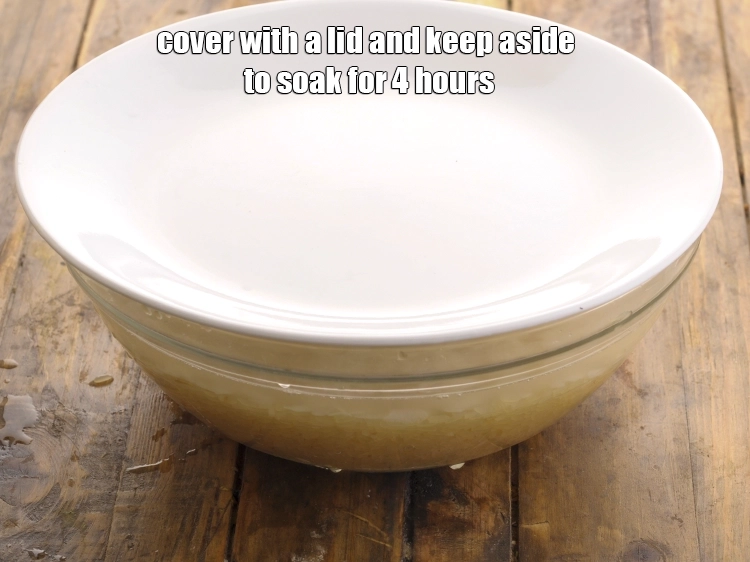
Pour enough water and mix well.

![]()
-
Cover with a lid and keep aside to soak for 4 hours.
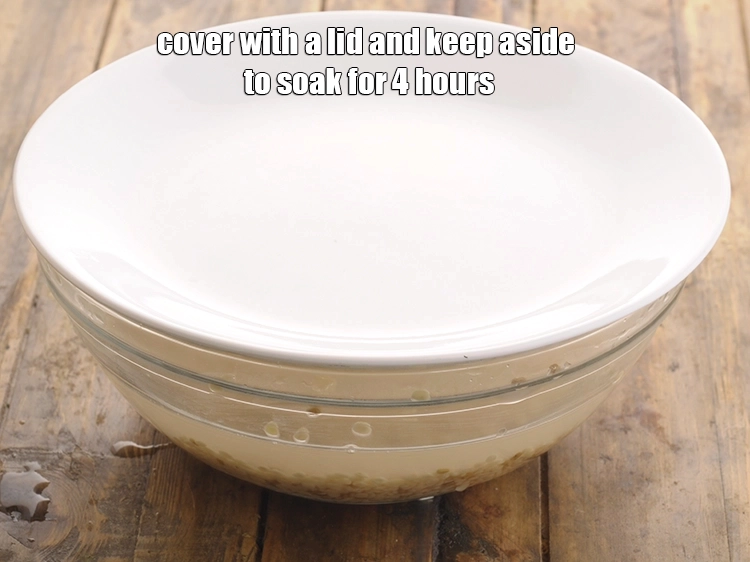
![]()
-
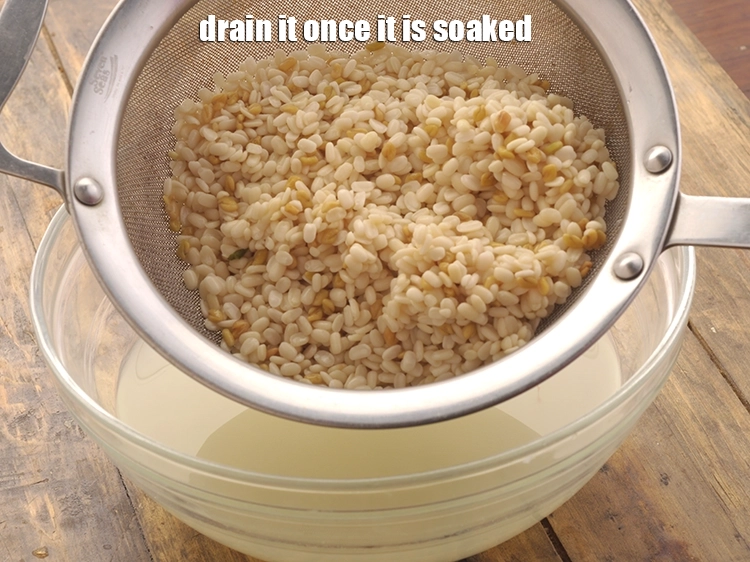
Drain it once it is soaked. Keep aside.
![]()
-
In another bowl, add par-boiled rice. For the homemade idli batter, we would highly recommend you make use of par-boiled rice which is a variety of short grained rice. Any variety of short or medium grained like sonna masoori, ponni rice works well. We wouldn’t suggest you to make use of long-grained rice like basmati.

![]()
-
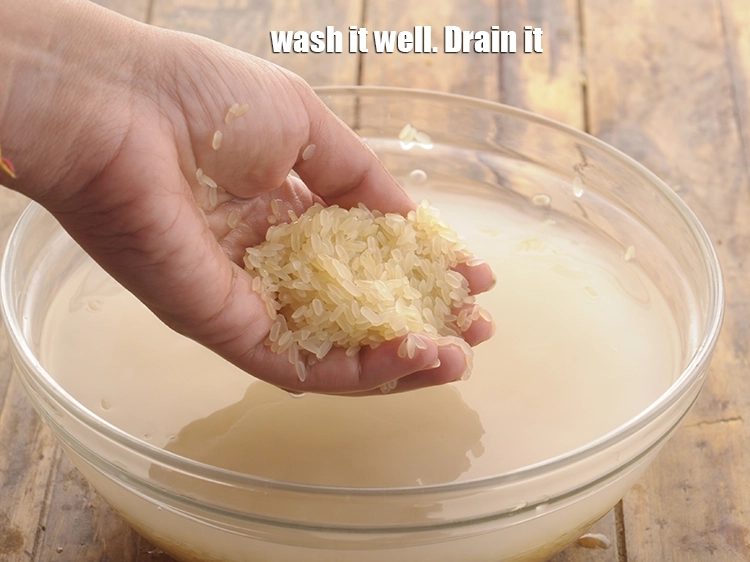
Wash it well. Drain it.
![]()
-
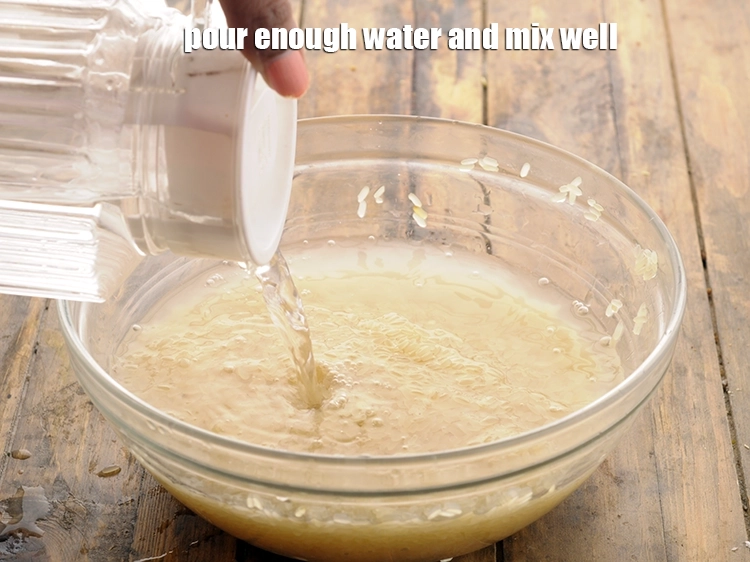
Pour enough water and mix well.
![]()
-
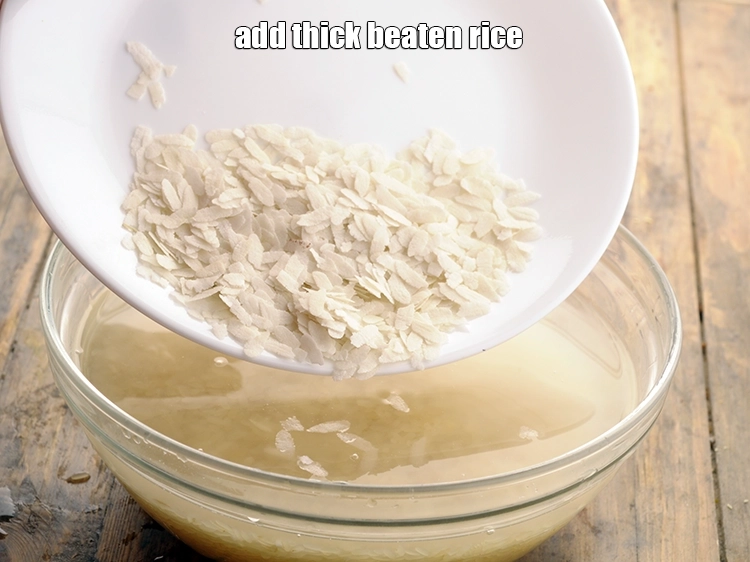
Add thick beaten rice.
![]()
-
Cover with a lid and keep aside to soak for 4 hours.
![]()
-
After 4 hours, drain the soaked parboiled rice. Keep aside.
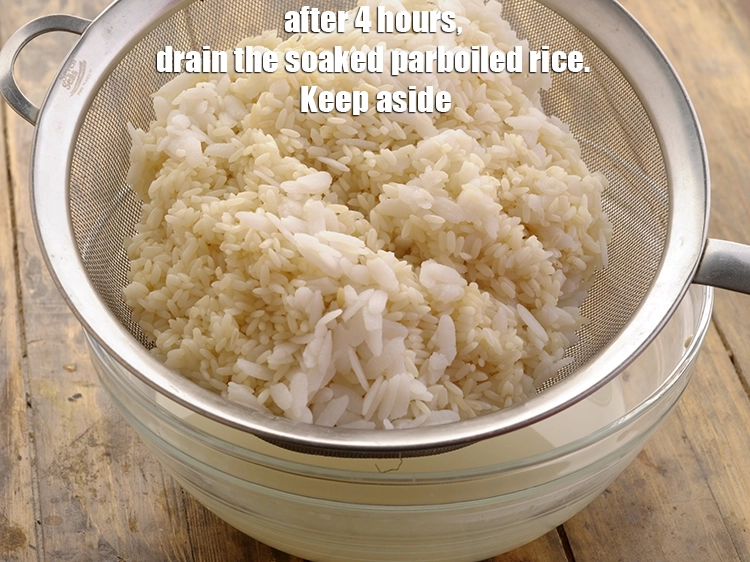
![]()
-
-
-
Transfer the soaked and drained urad dal and fenugreek seeds to a mixer jar.
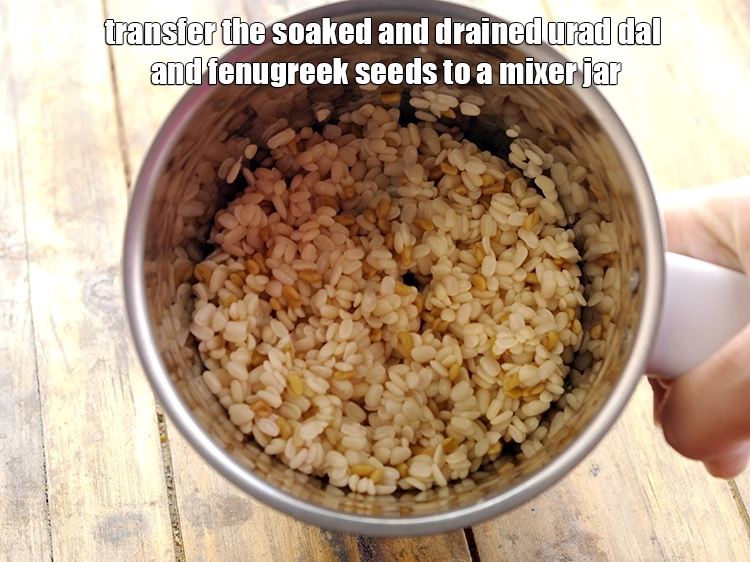
![]()
-
Add approx. 1 cup of water. Do not add all water at once, start with a lesser amount and add water as needed. Traditionally, a stone grinder is used to prepare idli/dosa batter. If you have one, make use of it or you can also make use of a wet grinder or mixer grinder like us. Ensure the batter does not warm up while grinding. If your mixer jar gets heated quickly, make use of cold water while grinding. This will prevent the idly from turning hard.
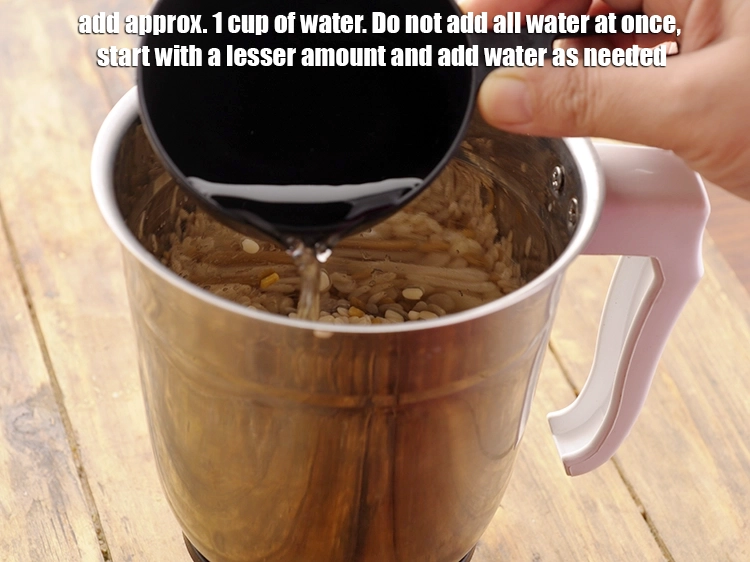
![]()
-
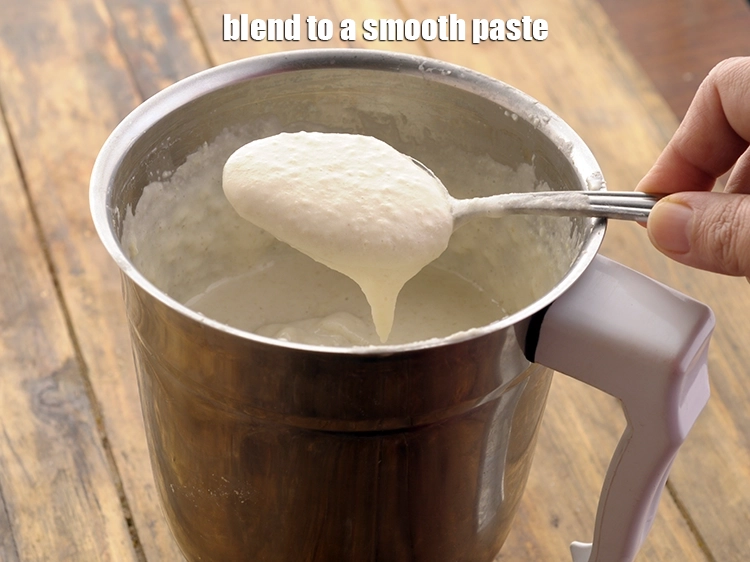
Blend to a smooth paste.
![]()
-
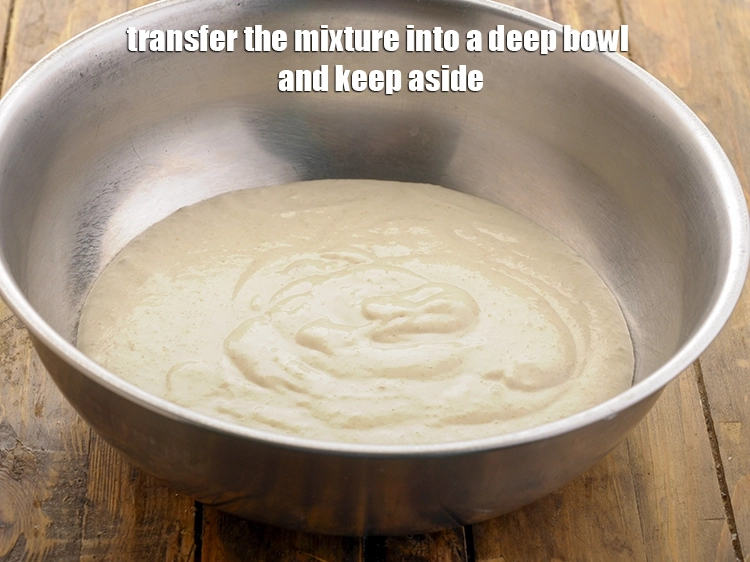
Transfer the mixture into a deep bowl and keep aside. A light fluffy batter is a key to soft, pillowy idlis.
![]()
-
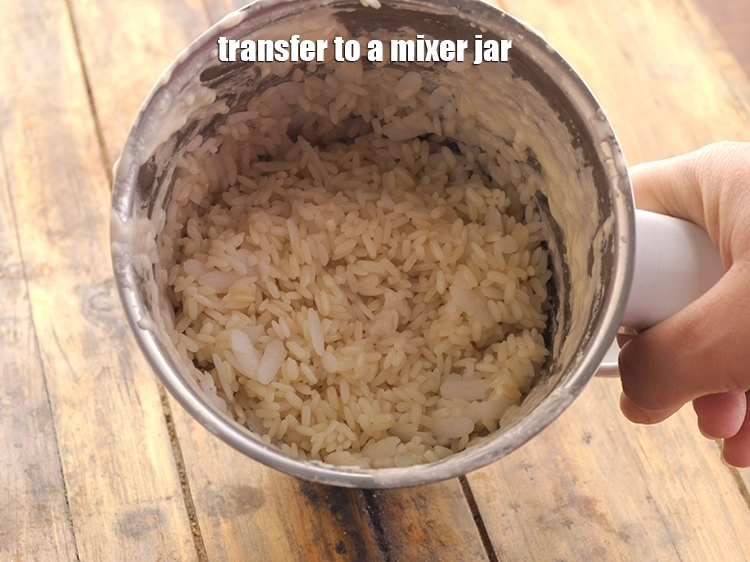
Similarly, par-boiled rice and thick rice flakes.Transfer to a mixer jar.
![]()
-
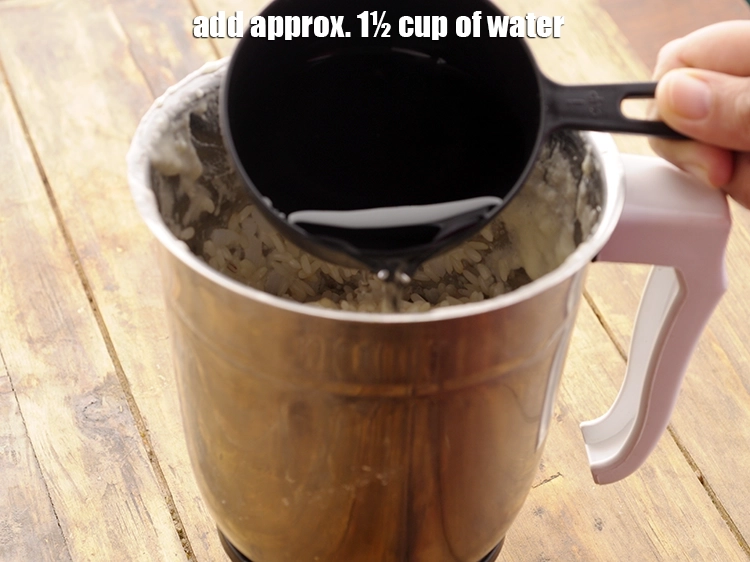
Add approx. 1½ cup of water. Add enough water to grind the batter and don’t be scared of the amount because less water results in denser idli. Also, the quantity of water depends upon the quality of rice you use
![]()
-
Blend to a slightly coarse paste.
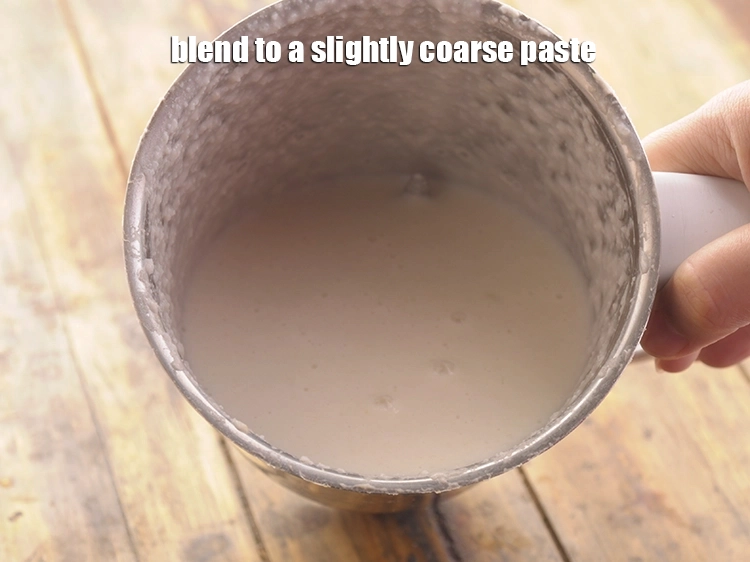
![]()
-
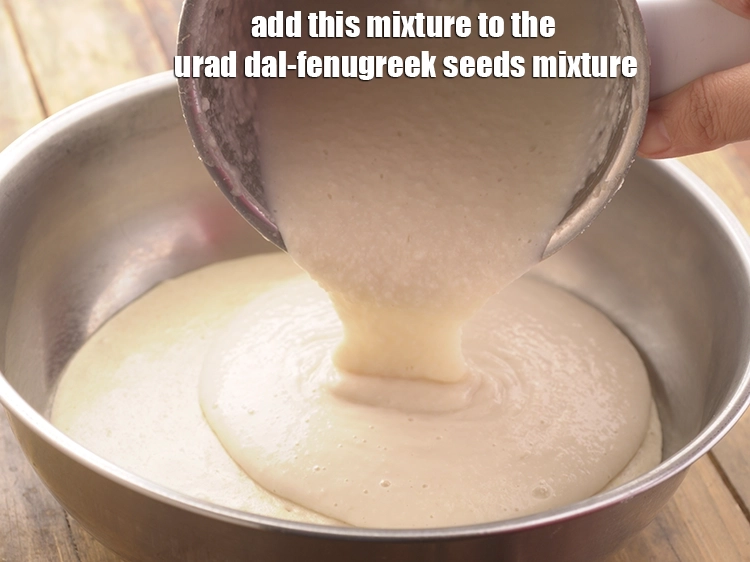
Add this mixture to the urad dal-fenugreek seeds mixture. Open the mixer jar once in between, push down the contents and blitz it. For the idli to have a fluffy texture, it is important to soak and blend the dal and rice separately.
![]()
-
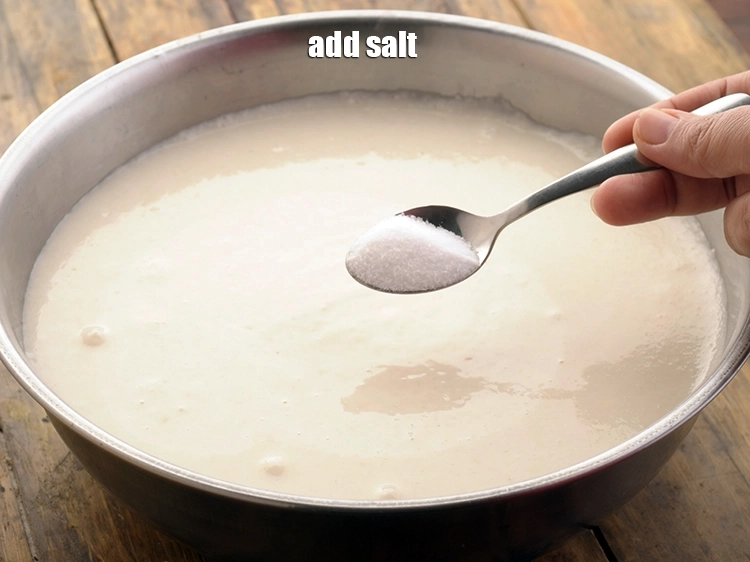
Add salt. There are conflicting thoughts about the addition of salt. Many people add before fermentation, many after. But, as per our observation the addition of salt helps in fermentation. Also, regular salt contains iodine which might interfere with the fermentation process so, many people use a non-iodized salt (rock salt or sea salt).
![]()
-
Mix very well with clean hands. Mixing with your hands helps in the fermentation process so don’t skip this step.

![]()
-
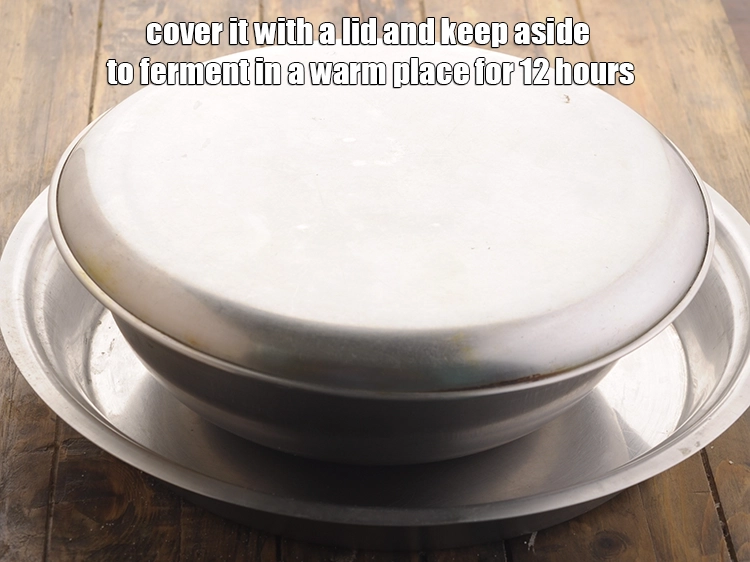
Cover it with a lid and keep aside to ferment in a warm place for 12 hours. Idli batter requires a warm place to ferment. If you live in a warm place, you can leave the batter outside on your kitchen counter and it will ferment. However, if you live in a cold place, place the batter in the oven with the lights on or in a preheated oven. Depending upon the weather, the batter will require somewhere between 8-12 hours to ferment.
![]()
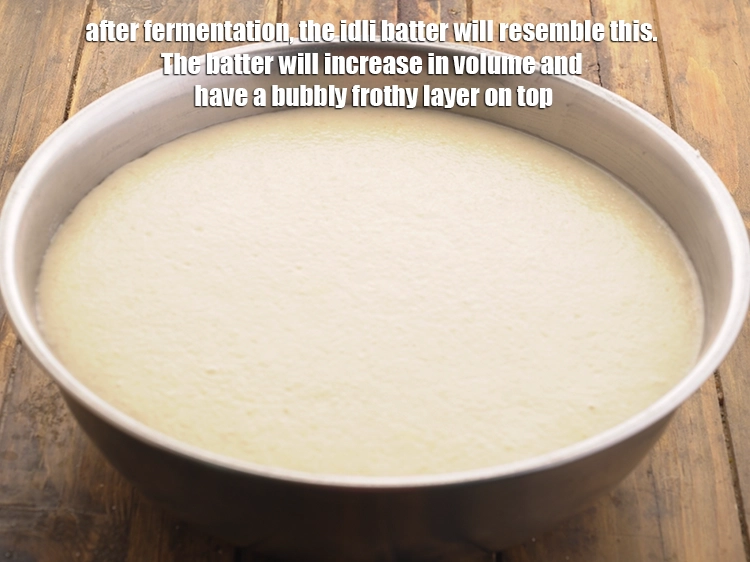
-
After fermentation, the idli batter will resemble this. The batter will increase in volume and have a bubbly frothy layer on top. There will also be a typical faint sour aroma from the fermented idli batter.
![]()
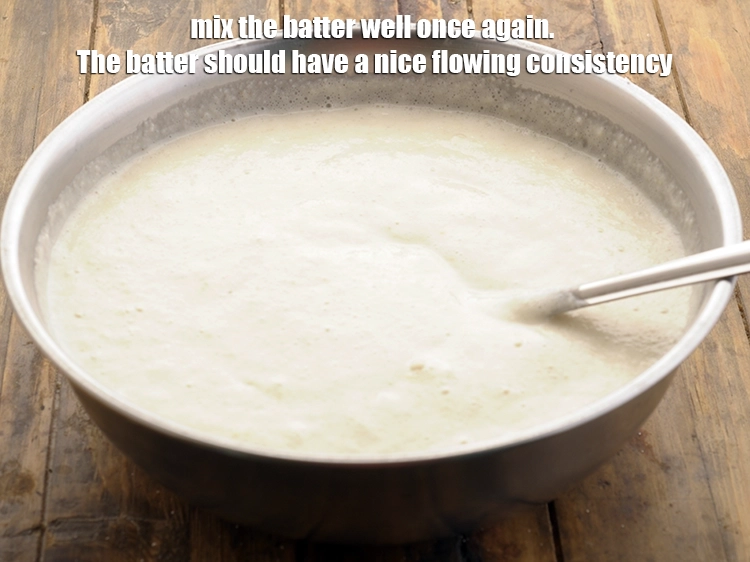
-
Mix the batter well once again. The batter should have a nice flowing consistency. It should neither be too thick or too runny. Now our idli batter is ready to prepare idli. If not using the entire batter immediately, refrigerate in an air-tight glassware. Storing the idli batter in plastic or steel container, might make the batter sour. You can even make crisp dosa and fluffy uttapam with the same batter!
![]()
-
-
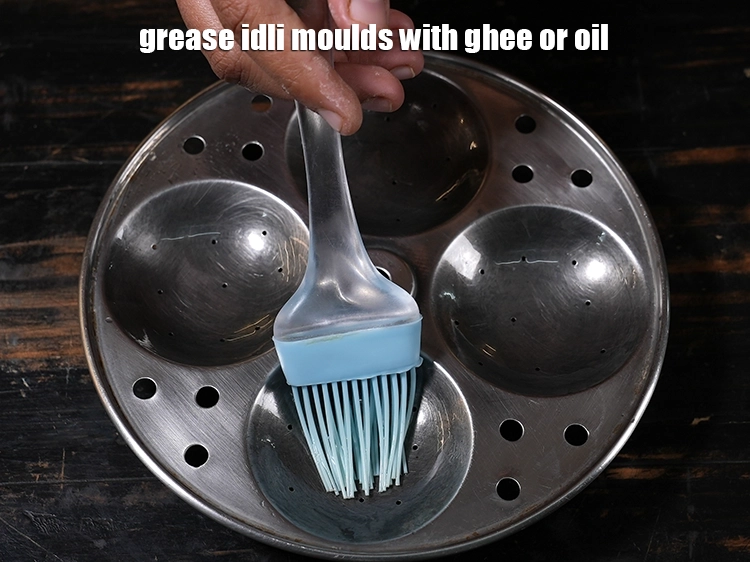
-
To prepare soft and fluffy idlis at home, grease idli moulds with ghee or oil. You can also steam the idli in a damp muslin cloth.
![]()
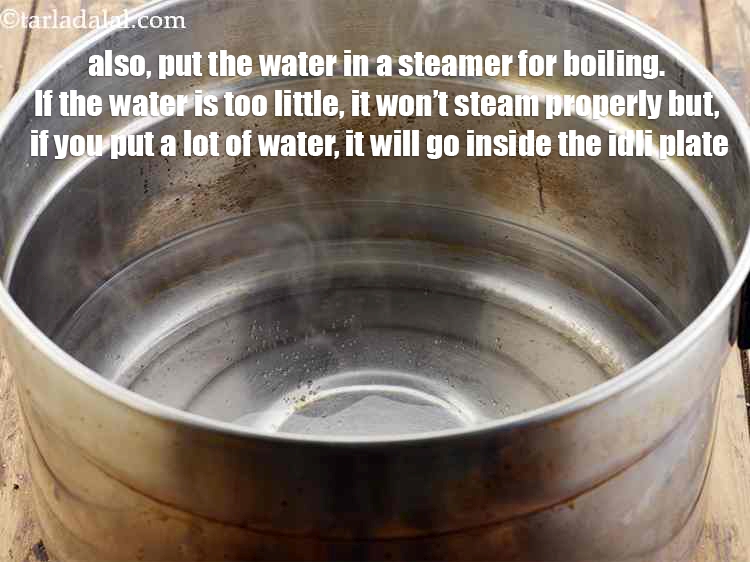
-
Also, put the water in a steamer for boiling. If the water is too little, it won’t steam properly but, if you put a lot of water, it will go inside the idli plate.
![]()
-
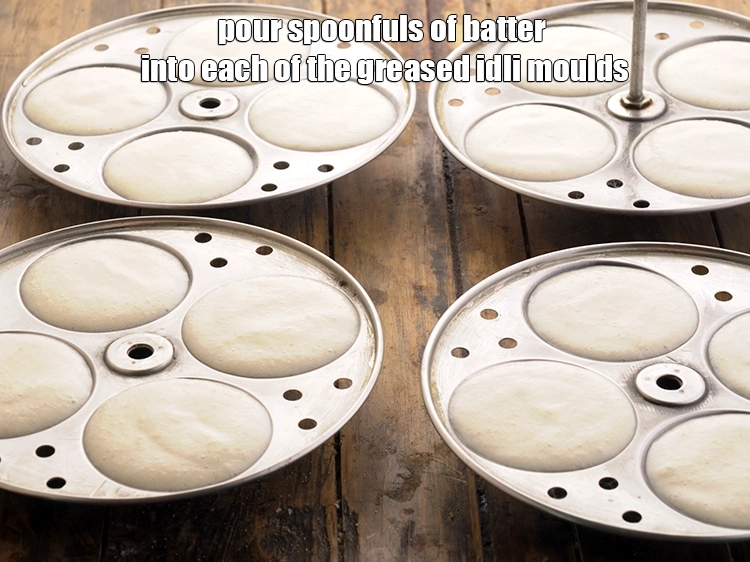
Pour spoonfuls of batter into each of the greased idli moulds. Do not overfill the mould, as the idli might fluff up and spill out. If you fill it less, the idlis will come out flat so, it should be just right.
![]()
-
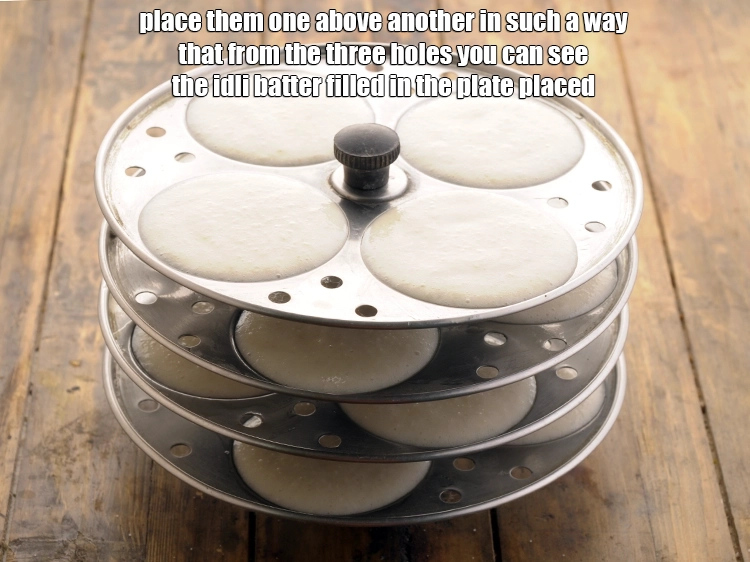
Once all your idli plates are filled and ready, place them one above another in such a way that from the three holes you can see the idli batter filled in the plate placed below, this will ensure even steaming. So, adjust accordingly.
![]()
-
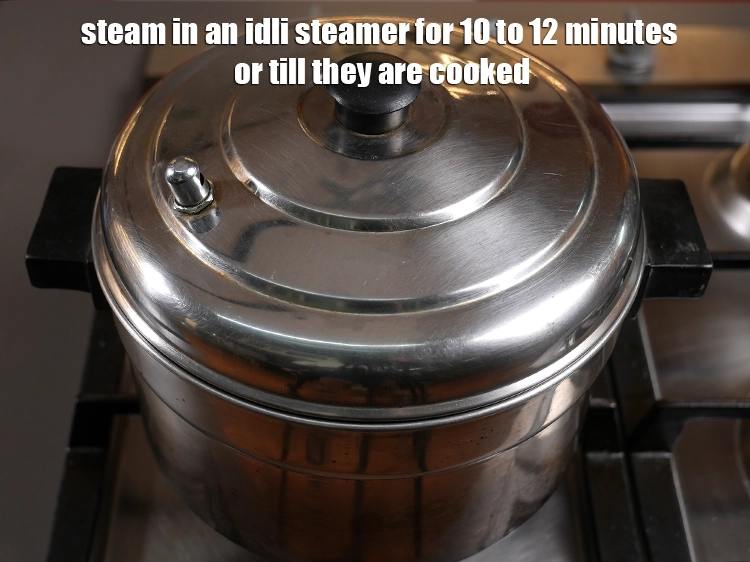
Steam in an idli steamer for 10 to 12 minutes or till they are cooked. If the flame is too high, the water might bounce to the idli plates so, make sure you cook on a medium flame. Also, idli tend to turn hard when cooked on a high flame.
![]()
-
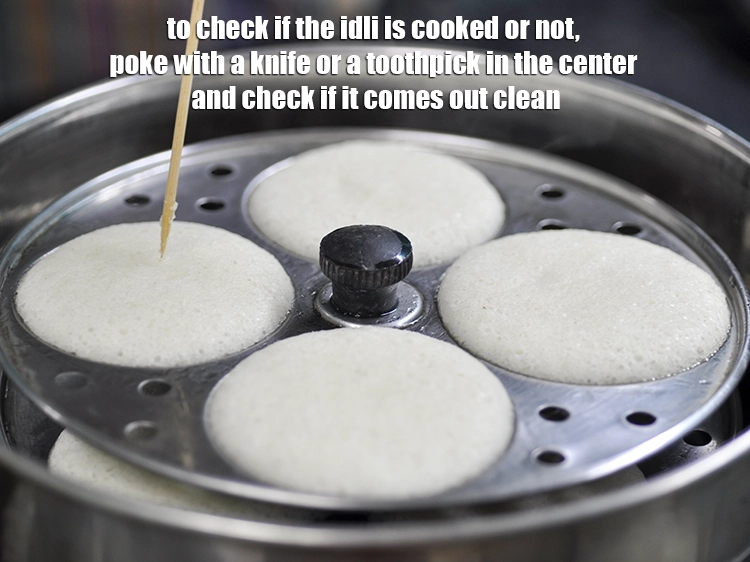
To check if the idli is cooked or not, poke with a knife or a toothpick in the center and check if it comes out clean. If not, steam for some more time.
![]()
-
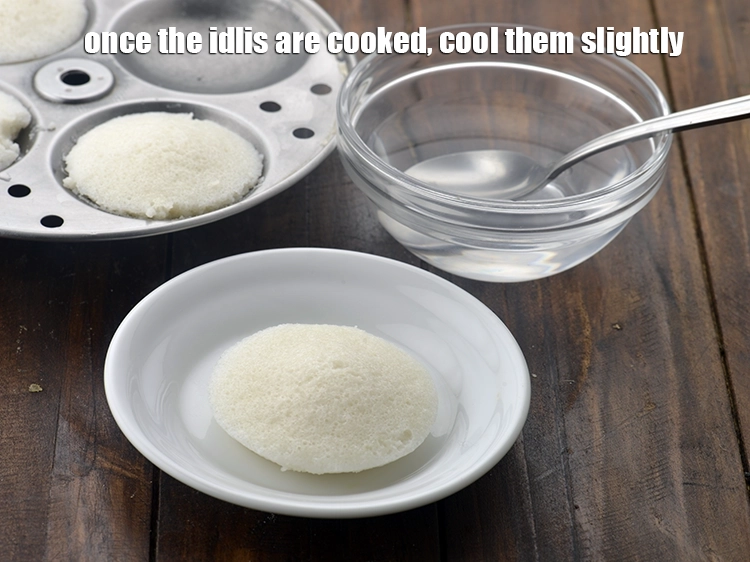
Once the idlis are cooked, cool them slightly. Dip a spoon in the water and using this spoon loosen the sides of idli and demould them. You can also make use of a greased knife to loosen the sides. Keep aside.

![]()
-
Repeat with the remaining batter to make more idlis.
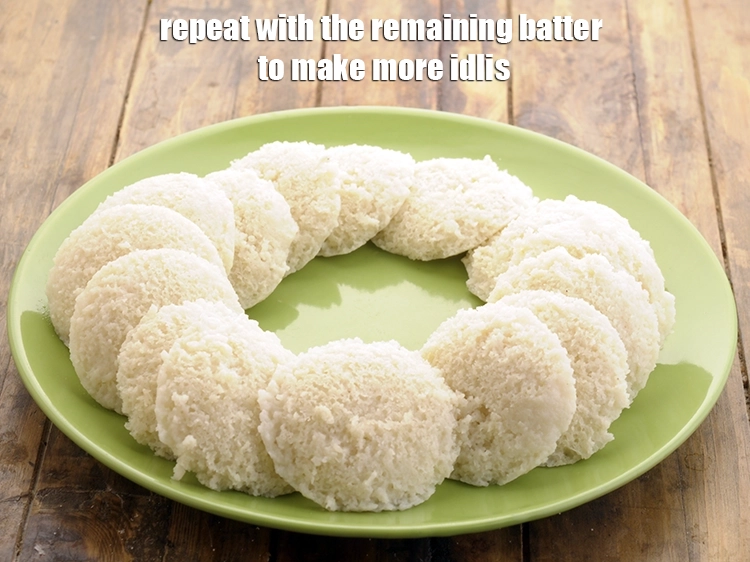
![]()
-
Serve idli hot with sambhar, coconut chutney and malgapodi.
![]()
-
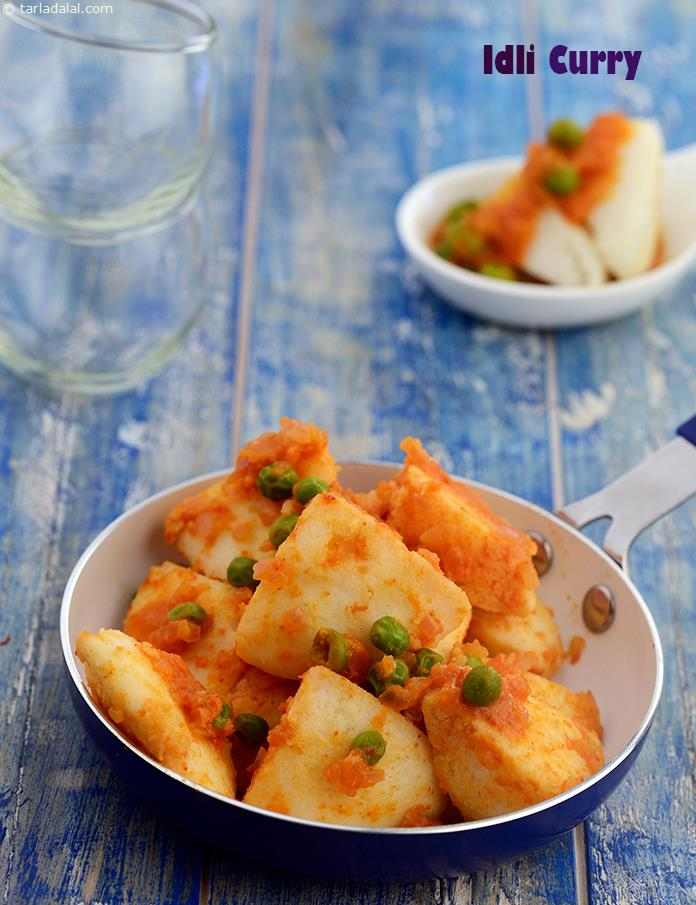
Here are some more popular accompaniments served along with idli : Rasam, South Indian Tomato Onion Chutney, Chutney Podi. Using leftover idli, you can make recipes like: Idli Curry, Idli Upma, Idli Chilli.
-
The idli recipe | South Indian style idli | soft idli | is made with urad dal and rice but, you can use a variety of pulses, millets and grains to make different idlis like : Barley Idli, Kanchipuram Idli, Green Moong Dal and Vegetable Idli.
-
You may like other South-Indian breakfast recipes like : Ven Pongal, Curd Upma, Puttu, Uppu Urundai.
-
-
- Q. What is Parboiled rice? Parboiled rice is rice that has been boiled in the husk. Parboiling makes rice easier to process by hand, improves its nutritional profile, and changes its texture.
- Q. I used same ingredents, as mentioned in your above recipe but it was not successful. Batter is so loose that it was uncooked even after 10-12 minutes? The water added is more. 1 cup measure that we have mentioned here is approx 200ml. If the batter is too loose it can be used for making Dosas.
-
Q. The leftover batter can it be stored in the refrigerator,if yes then for how many days? Yes the leftover batter can be stored in the refrigerator for at least a week.
Nutrient values (Abbrv)per plate
Nutrient values (Abbrv) per idli
| Energy | 33 cal |
| Protein | 1 g |
| Carbohydrates | 7.2 g |
| Fiber | 0.3 g |
| Fat | 0.1 g |
| Cholesterol | 0 mg |
| Sodium | 1.1 mg |
Click here to view Calories for Idli
The Nutrient info is complete

nainabhoot
Sept. 13, 2021, 8:51 a.m.
proportion of dal and rice is perfect. My idlis came out quite good
Sonal Modi
April 26, 2021, 3:11 p.m.
Excellent idlis. I loved this recipe.

Tarla Dalal
April 26, 2021, 3:11 p.m.
Hi, That''s great to know you have liked the recipe.. Do keep trying more recipes and give us your feedback..?
Srujan Desai
April 17, 2021, 12:29 a.m.
The proportions mentioned here are perfect. I make idlis, dosas and uttapams with the same batter and it works like magic. This recipes saves me so much effort in making breakfasts on weekdays. I make the batter once and I am sorted for a couple of days!
Tarla Dalal
April 17, 2021, 12:29 a.m.
Thanks Srujan. We actually worked very hard to get the perfect idli recipe. Please keep trying and provide us your feedback. Also try http://www.tarladalal.com/Sambhar-(--Idlis-and-Dosas)-1663r
Payal Parikh 86
April 9, 2021, 5:42 p.m.
These idlis are sooo fluffy and soft, they just melt in the mouth. I enjoy them with a bowl of hot sambhar..
Delcy
Sept. 26, 2020, 3:22 p.m.
I want to try this recipe, just had a few questions. 1. What is parbaoiled rice? Does it mean half cooked rice? 2. I have read other recipes of idle, where they add soda/ yeast for fermenting? Is this required? 3. The leftover batter can it be stored in the refrigerator,if yes then for how many days? 4. By adding fenugreek seeds wont the idli taste bitter?
Tarla Dalal
Sept. 26, 2020, 3:22 p.m.
Hi Delcy, Parboiled rice is not half cooked rice.. it is a kind of rice which is available in the market.It is also known as ukda chawal in hindi, the colour will be slightly yellowish, slightly transparent and fat in size. There is no requirement to add any soda or yeast, we have kept this batter for 12 hours to ferment in a warm place, which takes place naturally. Yes the leftover batter can be stored in the refrigerator for at least a week. Do try the recipe and give us your feedback.. Happy Cooking!!
Foodie #518850
May 31, 2020, 4:34 a.m.
nice n spongy without usin fruit salt. loved it..
MyHomeGrocers
March 31, 2020, 11:55 a.m.
Thanks for the recipe, I learned some new tricks to make soften idli
Veena
Feb. 27, 2020, 4:23 p.m.
priti
July 8, 2019, 10:11 a.m.
mam what is par boiled rice (ukda chawal ) pls explain
akanksha
July 4, 2019, 2:51 p.m.
Hey, Nice Recipe!
Sanjay
Nov. 2, 2018, 8:50 a.m.
Loved your explanation and the alternate green moong dal and vegetable idli recipe given.
Tarla Dalal
Nov. 2, 2018, 8:50 a.m.
Glad you liked the explanation.
Archana M
July 11, 2018, 11:07 a.m.
The ever best soft and spongy idlis... the flavor of the fenugreeks is so good. These idlis are soft even when cold. I have loved this recipe, which i was searching por so long. A must try for all the idli lovers.
kiran
May 20, 2017, 10:33 a.m.
mam i used same ingreditnts,as menrioned in ur above receipe but it was not successful.Batter is so loose that it was u cooked after 10-12 minutes.is their any solution or my batter will be wasted.pls suggest.
Sandhya Gangadhar
Nov. 20, 2016, 12:16 p.m.
kavita
Sept. 2, 2016, 1:38 p.m.
Can I use normal rice instead of boiled rice?
Tarla Dalal
Sept. 2, 2016, 1:38 p.m.
Hi Kavita, The rice we have used here.. is Parboiled rice.. not boiled rice.. which is readily available in the market.. also known as ukda chawal.. Do check in grocery store.. you will get it..and also try the recipe..
Poonam
March 18, 2016, 3:45 p.m.
Hi dear. I want to know other than par boilrice what we can use.Optional Rice for convenience
Vandana jain
Feb. 2, 2016, 5:13 p.m.
After trying lots of idli receipes this has given me the best idlies..they were very soft.. also the tips given in the video are also very useful..
Foodie #655047
Jan. 19, 2016, 10:37 a.m.
what is praboiled rice..??
A Meethan
Oct. 24, 2015, 3:24 p.m.
Hi, the recipe has helped me well. Thanks for writing up on this. But, it also falls under the category of Punjabi Breakfast, which I feel is a misleading information.
Seema Rani
Oct. 9, 2015, 10:07 a.m.
Recipe is awesome Didi con we use rice flour instead of rice
Tarla Dalal
Oct. 9, 2015, 10:07 a.m.
Hi Seema, No you should use rice and not rice flour. Follow the exact recipe to get best idlis.
Sunita
Oct. 7, 2015, 10:24 a.m.
Very nice recipe, I would like to try this recipe but just 1 question we have to use black lentil then what about the skin of the black lentil .. can we not use white urad Dal Thank you
Indira Indian Foods
July 27, 2015, 3:57 a.m.
Simple and healthy food of all time.
Dr. M.S. Thambirajah
June 2, 2015, 3:13 p.m.
What about the accompaniments such as sambar and chutney? Each serving of these have more calories than the idlley (about 200 calories).
Bitch me
Sept. 22, 2014, 1:55 p.m.
sapiri thumbo rinko dhim
Sept. 7, 2014, 4:28 p.m.
Tarla Dalal
Sept. 7, 2014, 4:28 p.m.
Thanks for the feedback !!! Keep reviewing recipes and articles you loved.
Wonderful recipe
Nov. 18, 2012, 11:42 a.m.
Tarla Dalal
Nov. 18, 2012, 11:42 a.m.
Thanks.
anil
Sept. 18, 2012, 10:12 a.m.
Is there requirement of soda ... And how to reduce cost of idli per piece for commercial purpose
Tarla Dalal
Sept. 18, 2012, 10:12 a.m.
Hi Anil, No need to add soda. We are not sure about commercial usage as we are not into it.
Mamta
Sept. 1, 2012, 11:13 a.m.
Need to know if I can use regular basmati rice - what I have in house ?
Tarla Dalal
Sept. 1, 2012, 11:13 a.m.
Hi Mamta, Sorry we have not tried this recipe with basmati rice.
Tatsvit
Aug. 16, 2012, 6:25 p.m.
Tarla Dalal
Aug. 16, 2012, 6:25 p.m.
Hi Tatsvit , we are delighted you loved the Idli recipe. Please keep posting your thoughts and feedback and review recipes you have loved. Happy Cooking.